
Setup & Install
Installing WordPress is a quick and straightforward process that usually takes just a few minutes. Follow these simple steps to set up WordPress on your website and get started with building your site.
Steps to Install WordPress
It usually takes less than five minutes to install WordPress under most circumstances. Nevertheless, if you wish to install WordPress yourself, follow the steps below.
Things to Know Before You Start Installing WordPress
Check that your web hosting provider meets the necessary requirements before installing WordPress. You must also have access to the server and some tools.
Server-Side Requirements
- PHP 7.4 or greater
- MySQL 5.6 or MariaDB 10.1 or greater
Local Requirements
- Login Account (user ID and password) to the server via FTP or shell
- Text Editor
- FTP Client
- Your web browser of choice
The main configuration file will need to be edited using a text editor. You can use Notepad if you are a Windows user, or TextEdit if you're using OS X. Template files may also need to be edited later.
To upload files and set permissions on them, you'll need an FTP program. If you want to do this with FileZilla, you can do so.
Now you are ready to begin installing.
Basic Instructions
Here is a quick version of the instructions for those already familiar with such installations. Please follow the instructions below for more details.
- WordPress can be downloaded from the official download page.
- Set up a MySQL (or MariaDB) database and a user with all privileges to access and modify it.
- If you want to add your database information, find and rename
wp-config-sample.phptowp-config.php. If you are not comfortable with renaming files, you can skip this step as the install program will create thewp-config.phpfile for you. - You need to upload the WordPress files to your web server in the following order:
- You can integrate WordPress into the root of your domain (e.g.,
https://yourdomain.com/) by moving or uploading all contents of the unzipped WordPress directory (excluding the WordPress directory itself). - Using FTP, upload the contents of the unzipped WordPress package to the blog directory on your server if you want your WordPress installation to be in its own subdirectory (e.g.,
https://yourdomain.com/blog/). - Note: Disable the option to convert filenames to lowercase in your FTP client.
- You can integrate WordPress into the root of your domain (e.g.,
- Using a web browser, access the URL to run the WordPress installation script. The WordPress files should be uploaded to this URL:
- In case your WordPress installation is in the root directory, you should visit: https://yourdomain.com/
- If you installed WordPress in a subdirectory called blog, for example, you should visit:
https://yourdomain.com/blog/
That's all! The WordPress installation should now be complete.
Detailed Instructions
Step 1: Download and Extract
The WordPress package can be downloaded from wordpress.org/download.
- Using a web browser, download and unzip the WordPress package on your computer before uploading it to a remote server.
- You can skip this step if you will be using FTP - uploading files is covered later.
- If you want to avoid FTPing, you can download WordPress directly to your web server using wget (or Lynx or another console-based web browser) if you have shell access to your web server:
wget https://wordpress.org/latest.tar.gzThen extract the package using:
tar -xzvf latest.tar.gzYou will find the WordPress package in the same directory as the latest.tar.gz file.
Step 2: Create the Database and a User
You may already have a WordPress database set up by your hosting provider, or there may be an automated setup solution. Whether you'll have to create one manually depends on your hosting provider's support pages or your control panel.
To create your WordPress username and database manually, follow the instructions below for using phpMyAdmin. Refer to the article Creating Database for WordPress to learn more about other tools such as Plesk, cPanel, and MySQL.
WordPress can be installed on an existing database that does not already contain WordPress - just be sure to give it a distinct prefix so that you do not overwrite existing tables.
Using phpMyAdmin
To create your WordPress username and database, you may follow these instructions if your web server has phpMyAdmin installed. phpMyAdmin can be installed automatically on most Linux distributions if you work on your own computer.
Note: These instructions are written for phpMyAdmin 4.9.2. There may be slight variations between versions of phpMyAdmin's user interface.
1. The Database dropdown on the left allows you to create a WordPress database if it doesn't already exist. Choose a name for your WordPress database: 'wordpress' or 'blog' is good, but most hosting services (especially shared hosting) will require a name beginning with your username and an underscore. Specify the database name and collation for your language and encoding in the Create database field. Generally, it is better to choose from the "utf8_" series and, if your language is not listed, select "utf8mb4_general_ci".
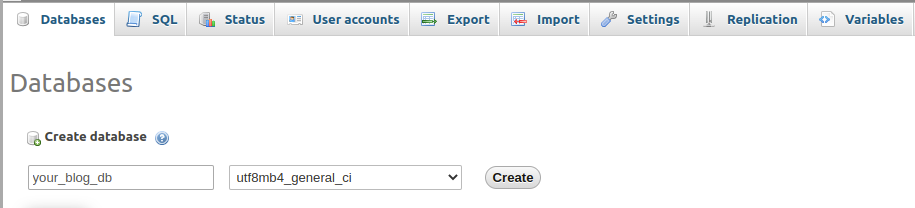
2. Click the phpMyAdmin icon in the upper left corner of the page, then choose Users from the left-hand menu. A WordPress user should be created if it does not already exist in the list of users:
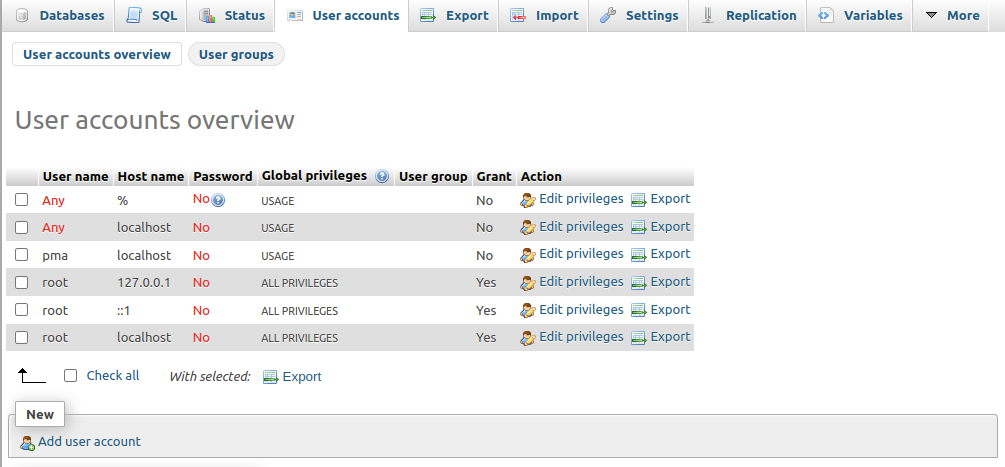
- Then click Add a user account.
- Select a username for WordPress ('wordpress' is good, but choose a strong name) and enter it in the User name field. (Ensure that "Use the text field" is selected from the dropdown.)
- Enter a secure password (ideally containing upper- and lower-case letters, numbers, and symbols), and click Save. Type in your password once more.
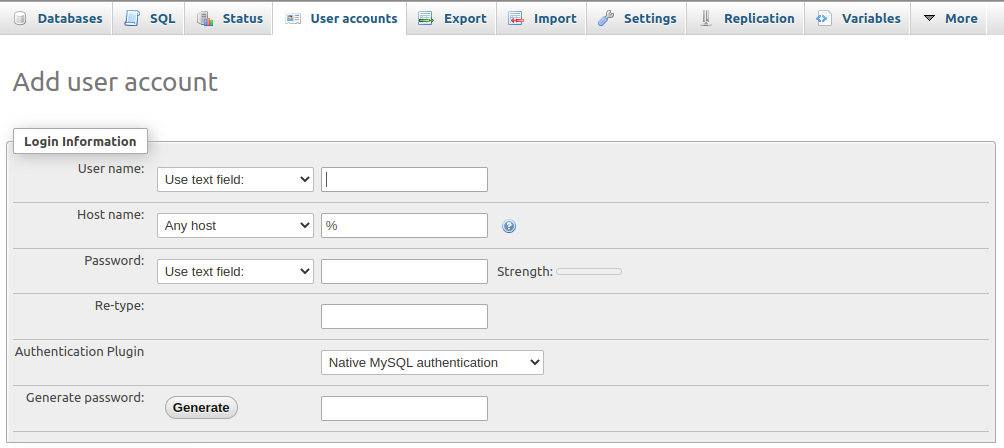
- Make a note of your username and password.
- The default settings should be left for all Global privileges.
- Click Go.
- To edit the privileges of the user you just created for WordPress, return to the Users screen and click Edit privileges.
- Click Add privileges to the following database under the Database-specific privileges dropdown and select the database you've just created for WordPress.
- The page will refresh with the privileges for that database. All privileges can be selected by clicking Check All and then clicking Go.
- Be sure to note the hostname listed after Server: at the top of the page. (This will usually be localhost.)

Step 3: Set up wp-config.php
If you skip this step and let WordPress do it automatically when you run the installation script (step 5), you can create and edit the wp-config.php file yourself. Your database information will still need to be provided to WordPress.
Rename wp-config-sample.php to wp-config.php in the folder where you extracted the WordPress package in Step 1.
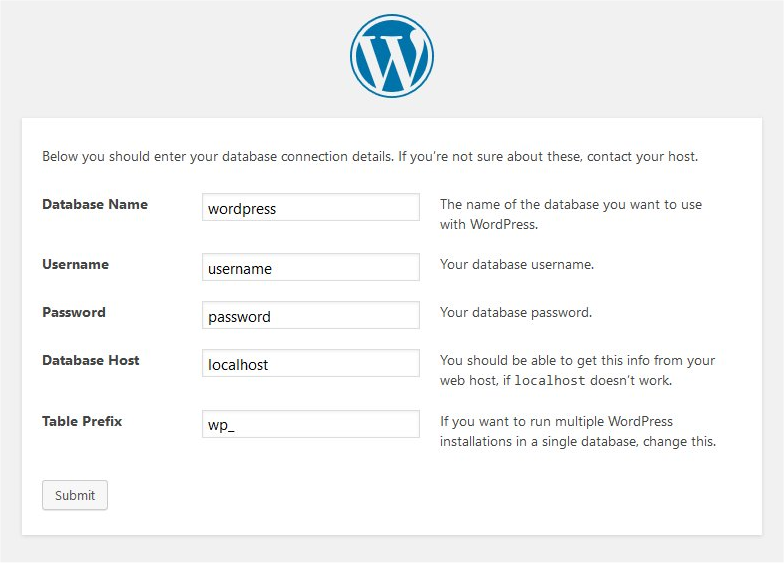
Your database information should be entered under the database section:
// ** MySQL settings - You can get this info from your web host ** //
define('DB_NAME', 'wordpress_db_name');      // Name of the database you created
define('DB_USER', 'wordpress_user');         // Username you created
define('DB_PASSWORD', 'secure_password');    // Password you configured
define('DB_HOST', 'localhost');              // Hostname (usually localhost)
define('DB_CHARSET', 'utf8mb4');             // Database Charset (keep default)
define('DB_COLLATE', '');                    // Collate type (keep blank)
Enter your secret key values under the section labeled "Authentication Unique Keys and Salts." Save the wp-config.php file.
Step 4: Upload the Files
Next, you must decide where your WordPress-powered site should appear on your domain:
- Your website's root directory. (Example:
https://yourdomain.com) - Your website's subdirectory. (For example,
https://yourdomain.com/blog/)
Note: The location of your root web directory on your web server will vary depending on your hosting provider and operating system. If you don't know where this is, contact your hosting provider or system administrator.
In the Root Directory
- Using an FTP client, upload all the contents of the wordpress directory (but not the directory itself) into the root directory of your website if you need to upload your files.
- You can move all of the contents of the wordpress directory (but not the directory itself) into your website's root directory if your files are already on your web server and you are using shell access to install WordPress.
In a Subdirectory
- To upload your files to your website, rename the wordpress directory to your desired name, then use an FTP client to upload the directory to your desired location within the root directory.
- You can move the wordpress directory to your desired location within the root directory of your website and rename it to whatever name you desire if your files are already on your web server and you are using shell access to install WordPress.
Step 5: Run the Install Script
Point a web browser to start the installation script.
- To install WordPress, go to:
https://yourdomain.com/wp-admin/install.phpif your WordPress files are in the root directory. - For example, if you placed the WordPress files in a subdirectory called blog, you should visit:
https://yourdomain.com/blog/wp-admin/install.php.
Setup Configuration File
WordPress will tell you if it can't find the wp-config.php file and offer to create and edit it for you. WordPress will ask you for the database details and write them to a new wp-config.php file. You can also do this directly by loading wp-admin/setup-config.php in your web browser. In case this works, you can proceed with the installation; otherwise, create, edit, and upload the wp-config.php file yourself (step 3).
Finishing Installation
Here are some screenshots showing how the installation progresses. You must enter your site title, your desired username, your choice of password (twice), and your e-mail address when entering the details screen. Your blog will also appear in search engines like Google and DuckDuckGo if you check the box. Check the box if you want search engines to be able to see your blog, but leave it unchecked if you want normal users to see it. Your Administration Screen allows you to change all of this information later.
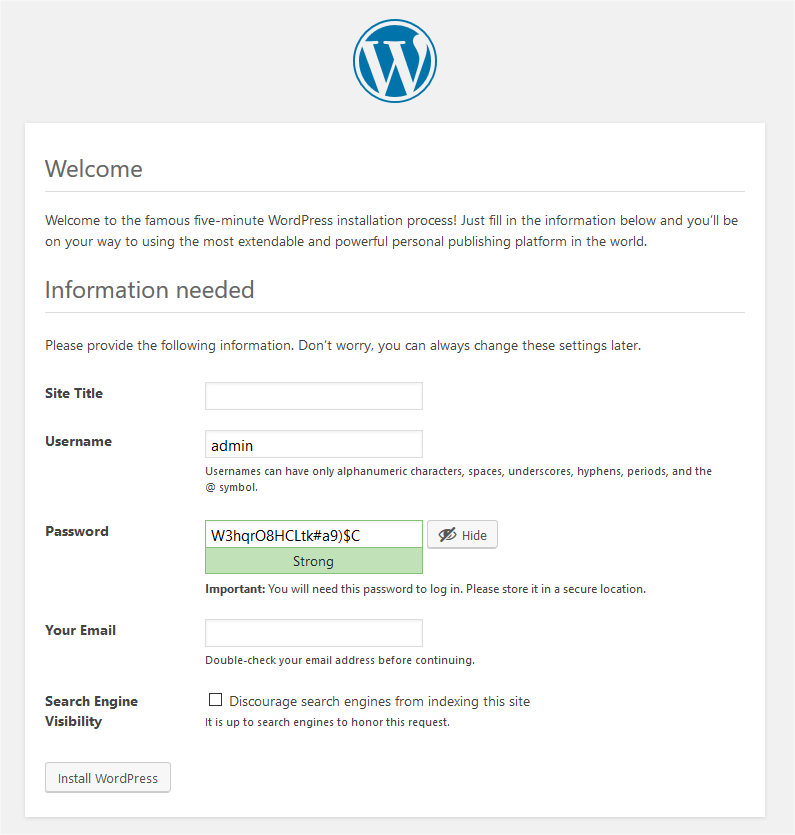
A login prompt will appear if WordPress is successfully installed.
Related Posts
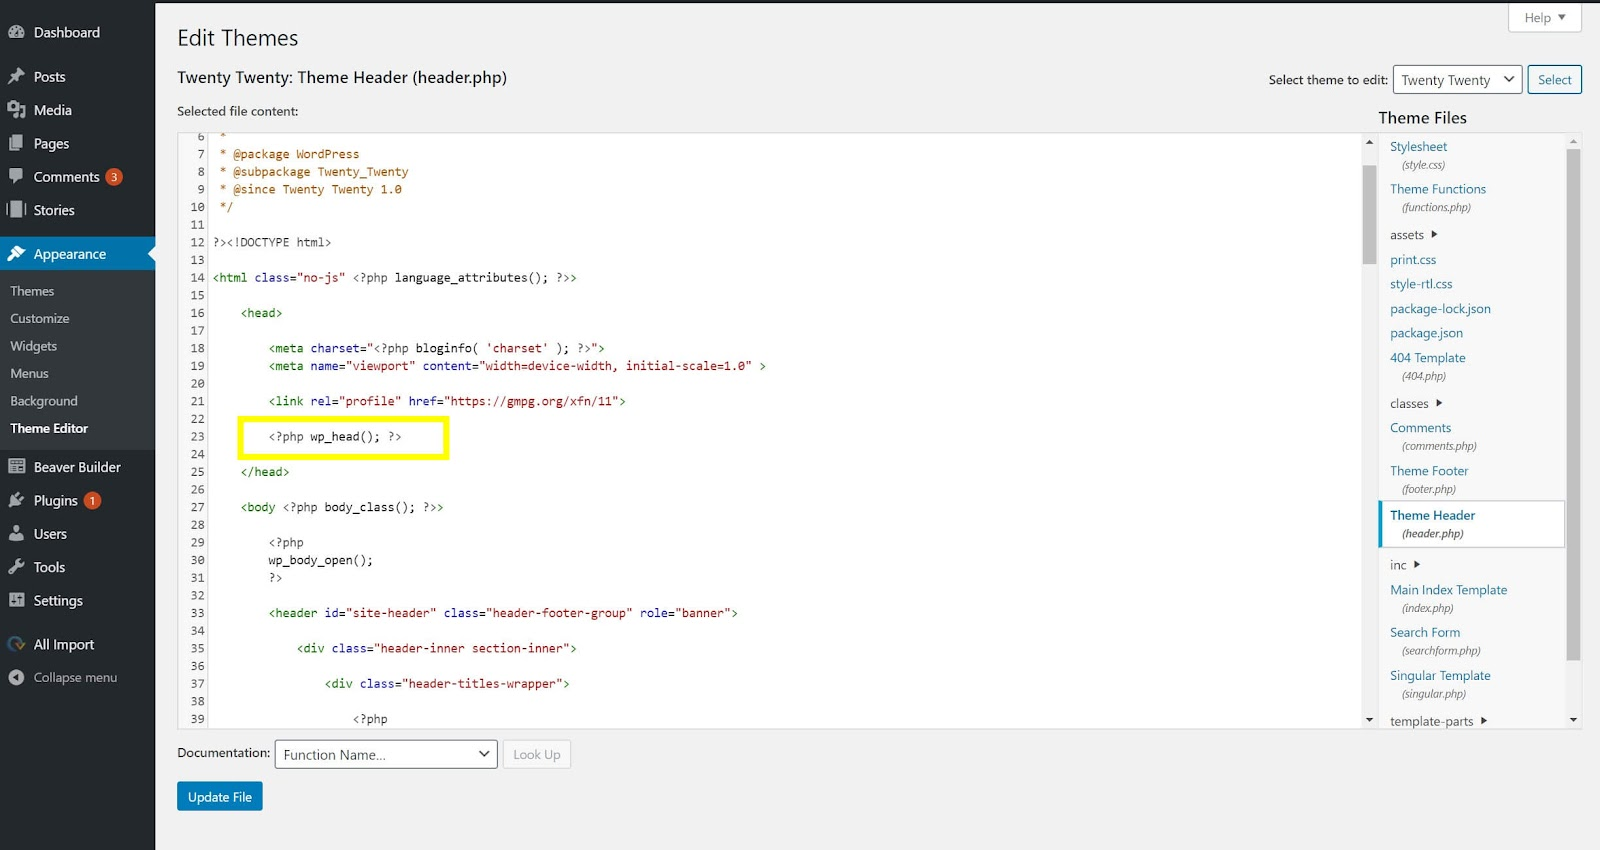
WordPress Hooks
WordPress hooks let you extend and customize your website beyond the limitations of themes. Using actions and filters, you can add new functionality or modify existing features without changing core files, making WordPress more flexible and easier to tailor to your needs.

How To Use Ajax in WordPress
Ajax makes WordPress websites more interactive by enabling real-time updates without reloading the page. With the help of Ajax-powered plugins, you can easily add dynamic features that improve user engagement and create a smoother browsing experience.
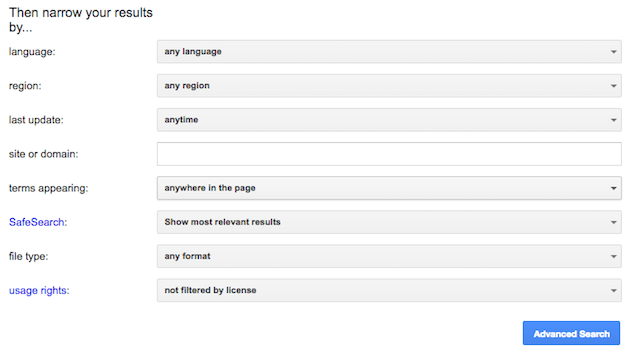
WordPress Filters
Search filters make it easier for customers to quickly find products in large eCommerce catalogs, improving the shopping experience and increasing the likelihood of conversions. This article explores the benefits of search filters and highlights WordPress plugins that can enhance your online store.
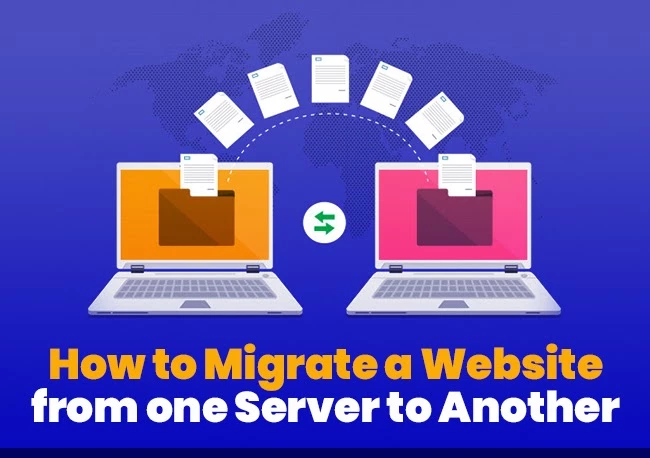
Website and Server Migration
A website is a collection of interconnected web pages and content that share a common domain name and are hosted on a server. Understanding how websites and servers work provides the foundation for building and managing an effective online presence.