
How To Create Custom Elementor Blog Post Template
A well-designed blog page can boost engagement and strengthen your content marketing efforts. With Elementor, you can create a custom blog template from scratch or customize prebuilt layouts to showcase your content in a more attractive and user-friendly way.
How To Create Custom Elementor Blog Post Template
Are you looking for the easiest tutorial on how to create a custom Elementor blog post template?
Blogs are one of the most popular and effective ways to create awareness about your product. However, if you want to enjoy the most benefit out of content marketing, you need to make sure your blog page has a captivating look along with the right information.
To make your blog post appealing, you need to create your own custom blog template. And you can achieve an outstanding blog post template to engage your audience using Elementor. You can create an Elementor custom blog page from scratch as well as build one using prebuilt templates.
In this article, you will learn how to create an Elementor blog post template using two methods in the simplest ways possible. So, keep reading…
Plugins You Need to Install to Create a Custom Elementor Blog Post Template
To create a blog post in WordPress with Elementor page builder effortlessly, you will need both:
- Elementor
- Elementor Pro
How to Create Elementor Custom Blog Page Template From Scratch
Elementor Pro provides all the necessary widgets you will need to create a stunning custom blog post template from absolute scratch. Just follow the below-mentioned steps to create your single Elementor post template:
Step 1: Create a New Single Blog Template
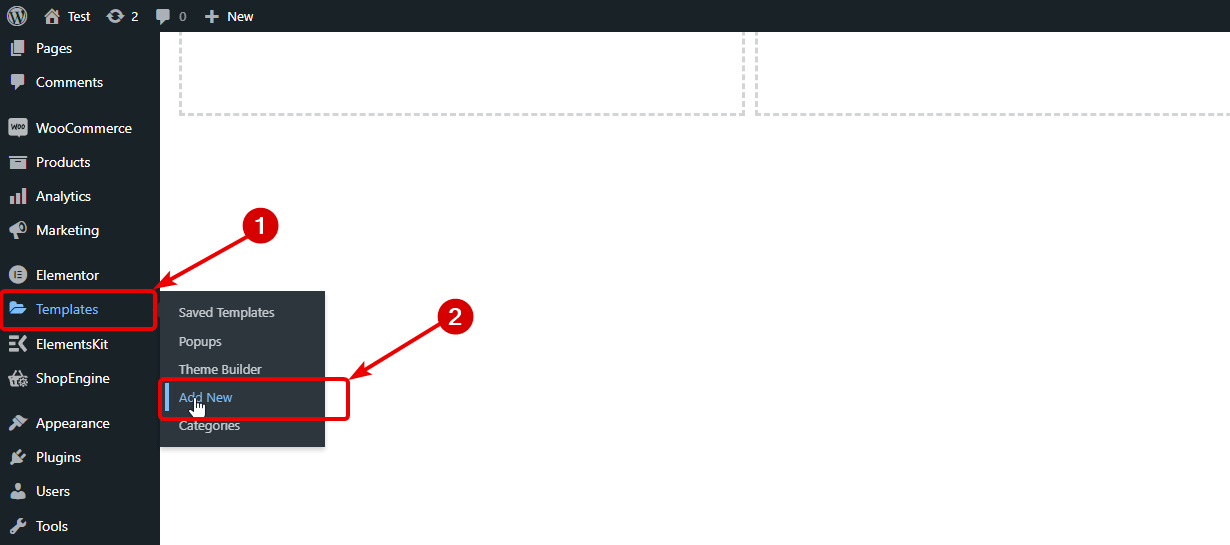
First, you need to create a single blog template. For that, go to your WordPress Dashboard and then navigate to Templates ⇒ Add New:
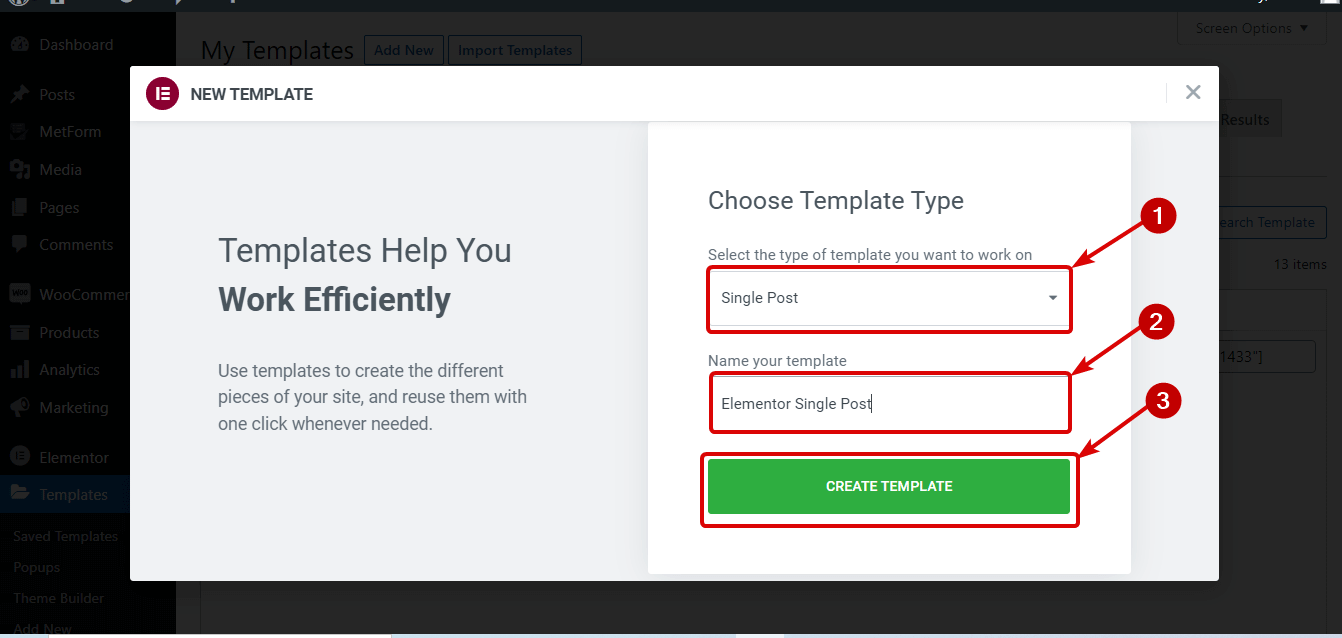
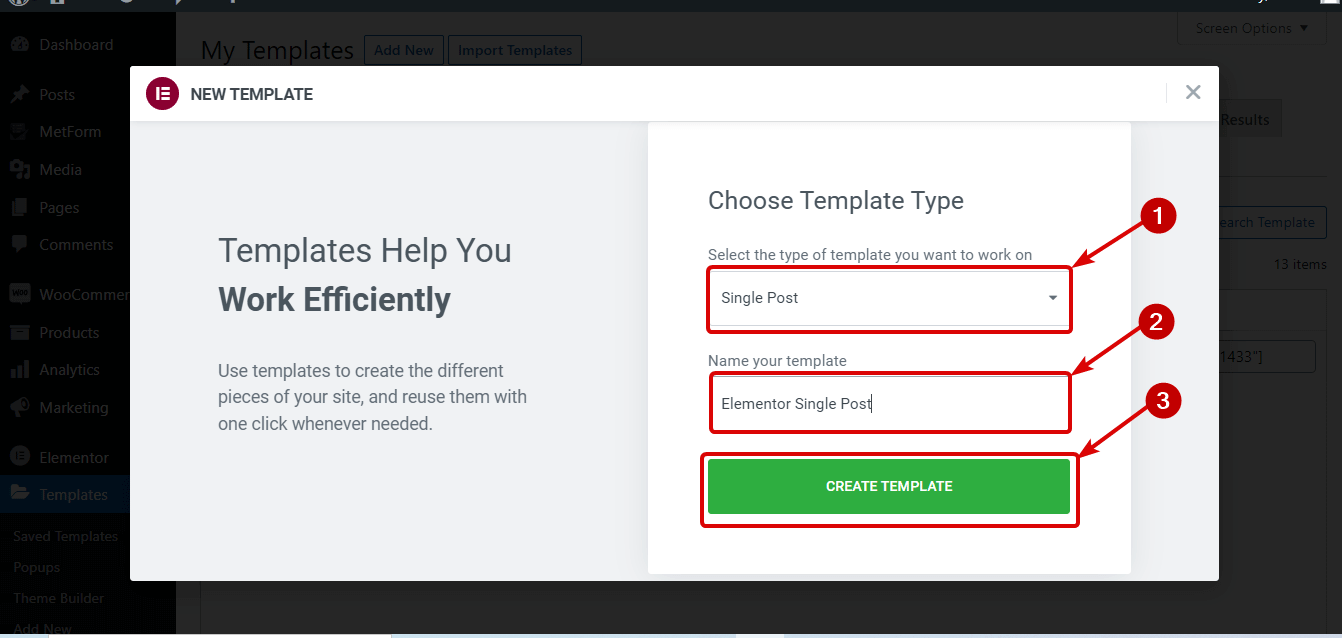
Click on the Add New button. Once the new window opens, select Single Post as the type of template from the dropdown, provide a name of your choice, and then click on Create Template.
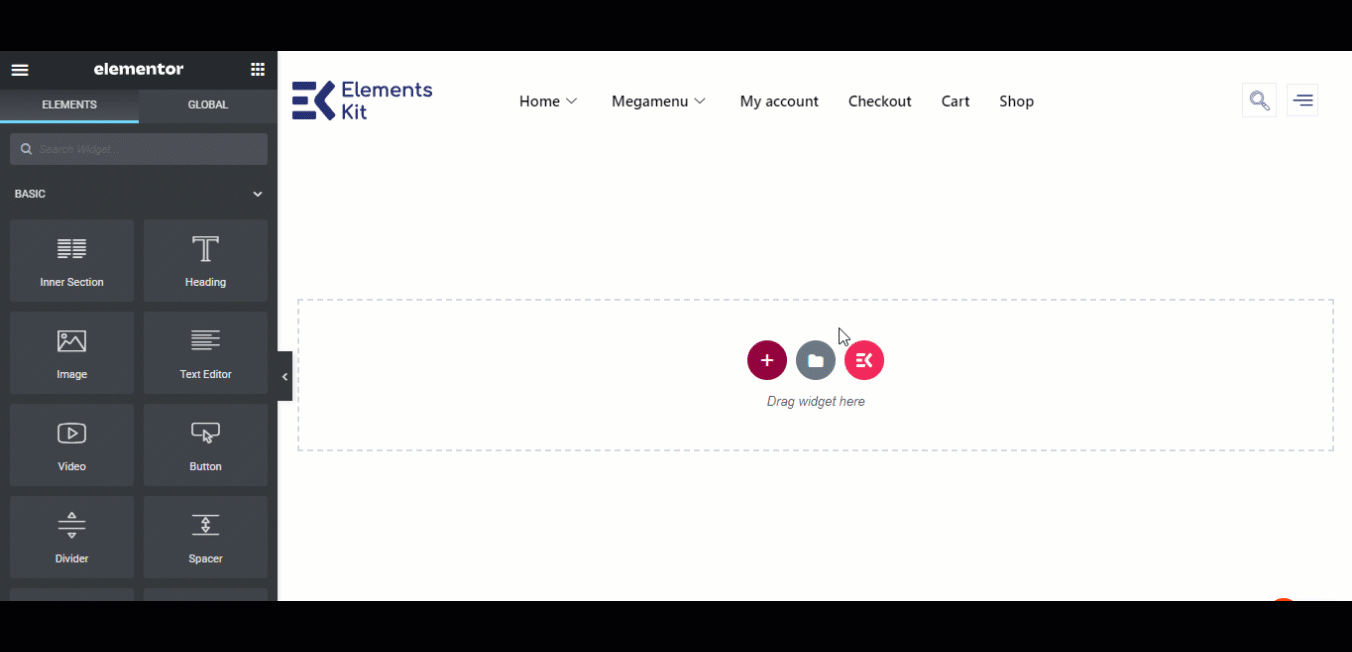
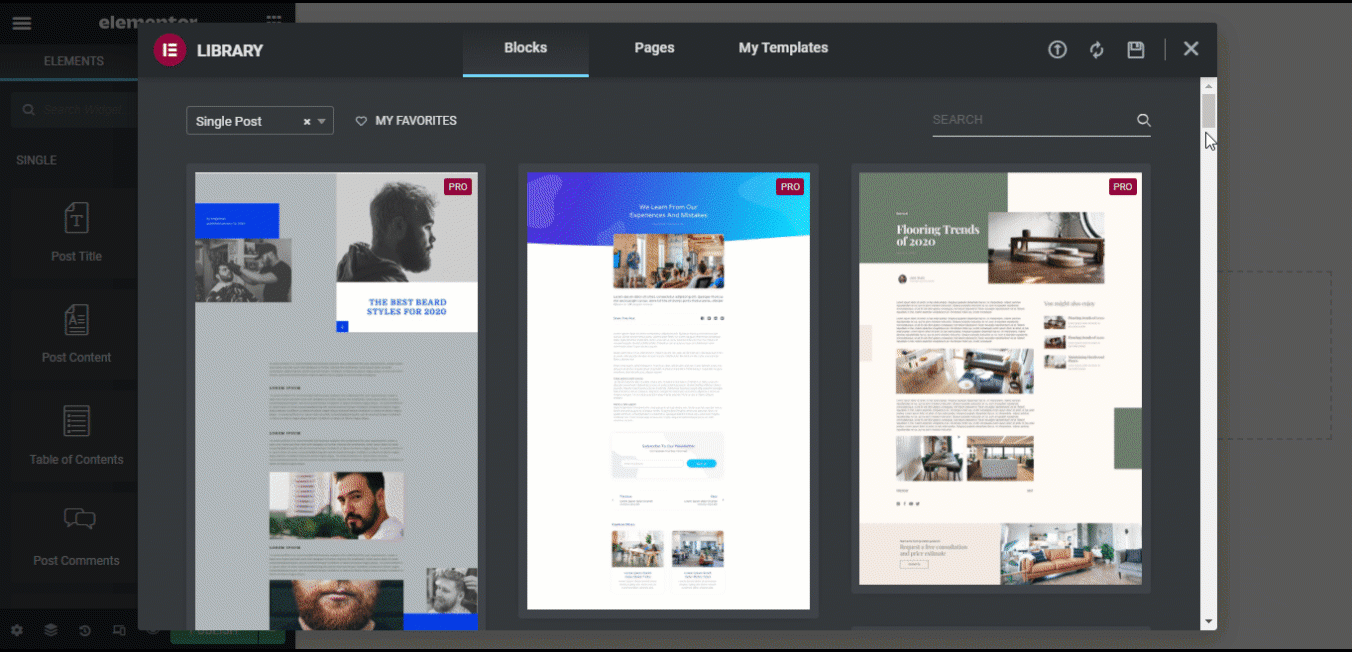
Now you should see the premade layouts (we will cover how to use those later). Since we are going to build a blog template from scratch, click on the cross button in the top right corner to close this library window.
Step 2: Select a Structure/Layout for the Blog Post Template
Now, you need to choose a structure for your blog template. It’s recommended not to use the whole width of a page, as it gets hard for users to read long lines of text. To choose a structure for your Elementor custom blog page template, click on the + icon, select the layout you like, and click on it to insert.
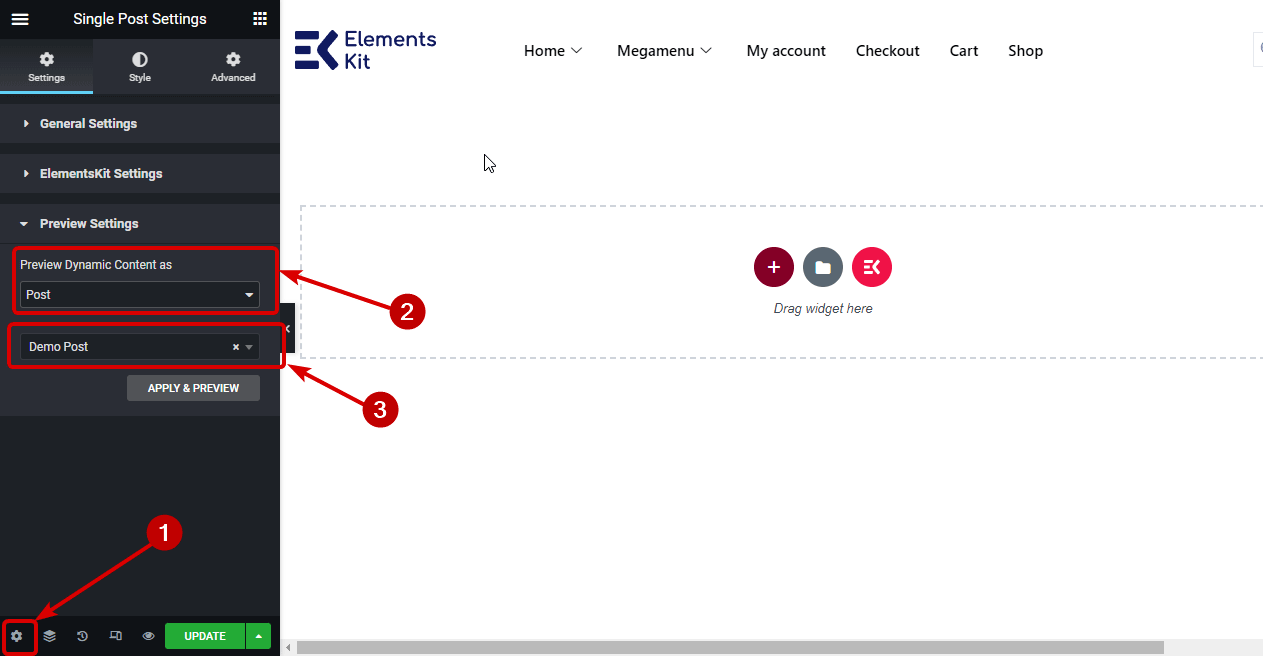
Note: To see how a blog will look with the template you are creating, select an existing blog from the preview dynamic content option. To set that, click on the Settings option at the bottom left corner.
Then, choose Post from the Preview Dynamic Content dropdown, and type the name of the blog post you want to select in the second input box below. Finally, click on Apply & Preview.
Step 3: Add Featured Image Widget and Customize Image Style Options
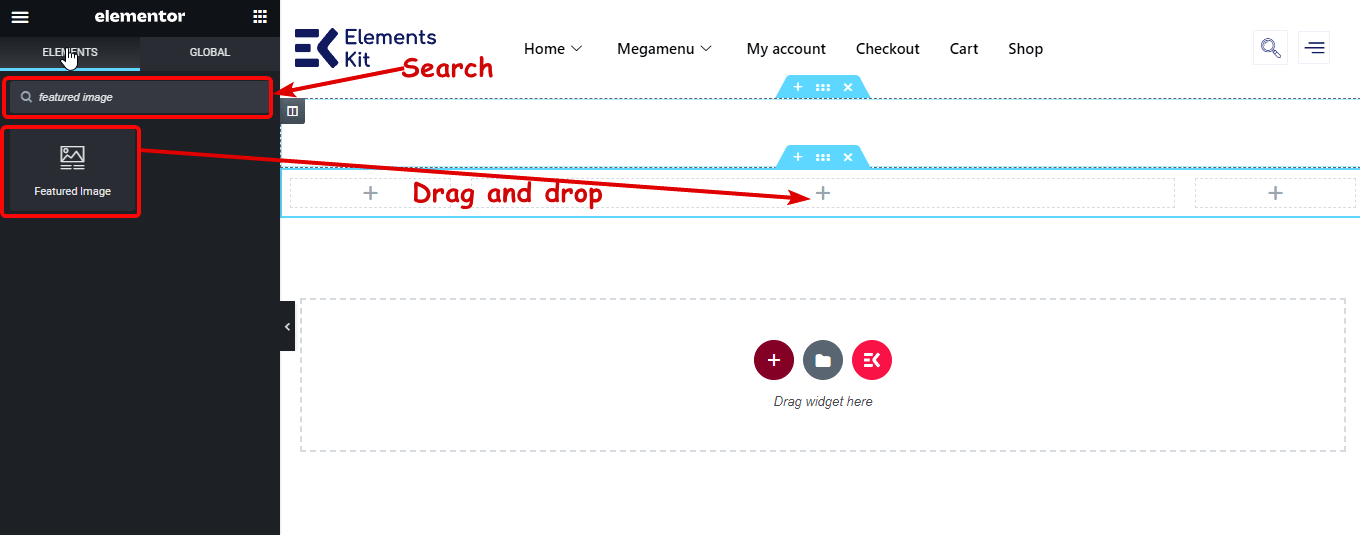
Once you have the layout, go to the left editor bar and search for the Featured Image widget. After you find the widget, drag and drop it into the desired layout column.
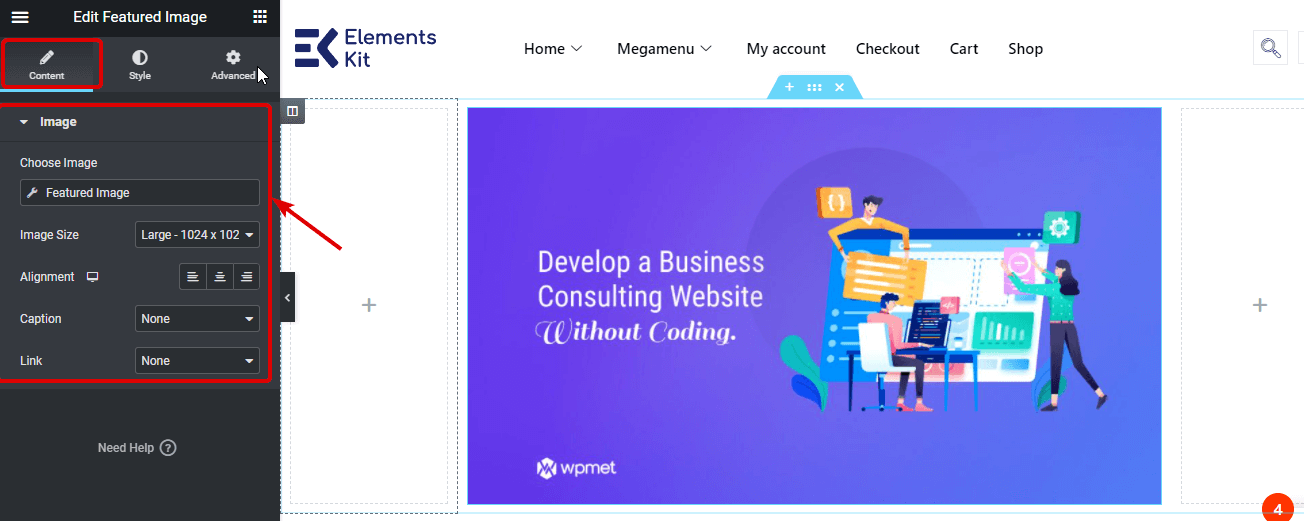
After the widget loads, customize the image size, alignment, caption, link, and lightbox settings.
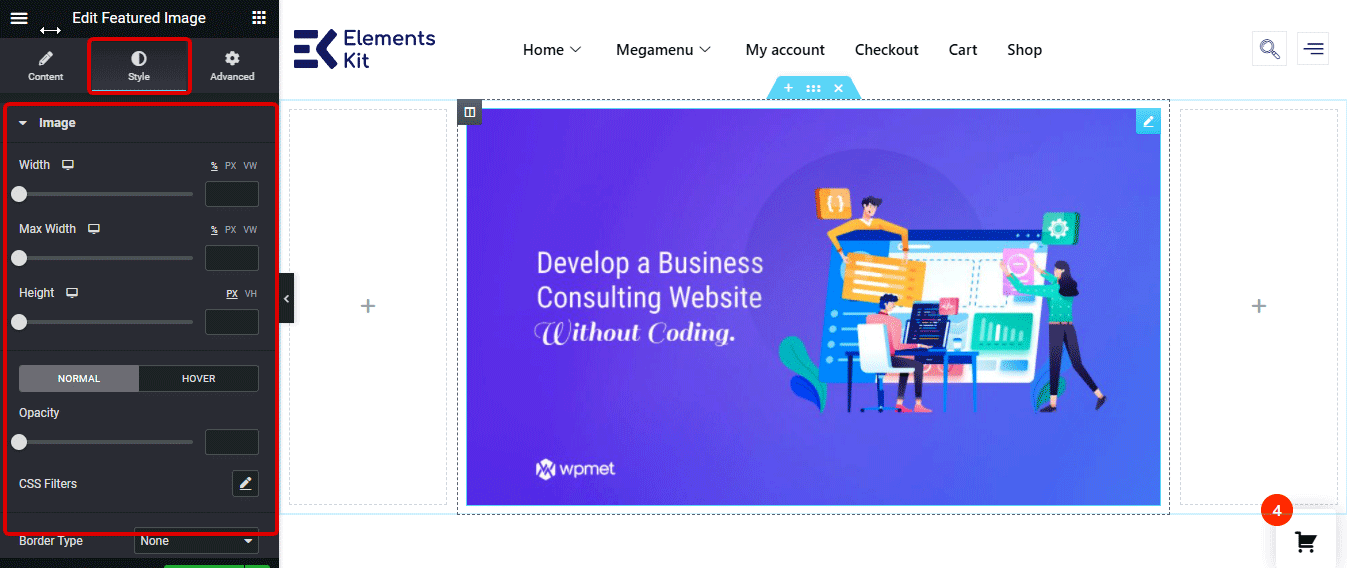
To change the style settings, navigate to the Style tab. Here you can change the image height, width, opacity, border, border radius, and more.
Step 4: Add and Customize the Elementor Post Info Widget
After the featured image, you should display the post-related meta information, which you can do with the Post Info widget. Just like before, search for the Post Info widget in the sidebar, then simply drag and drop it below the Featured Image widget.
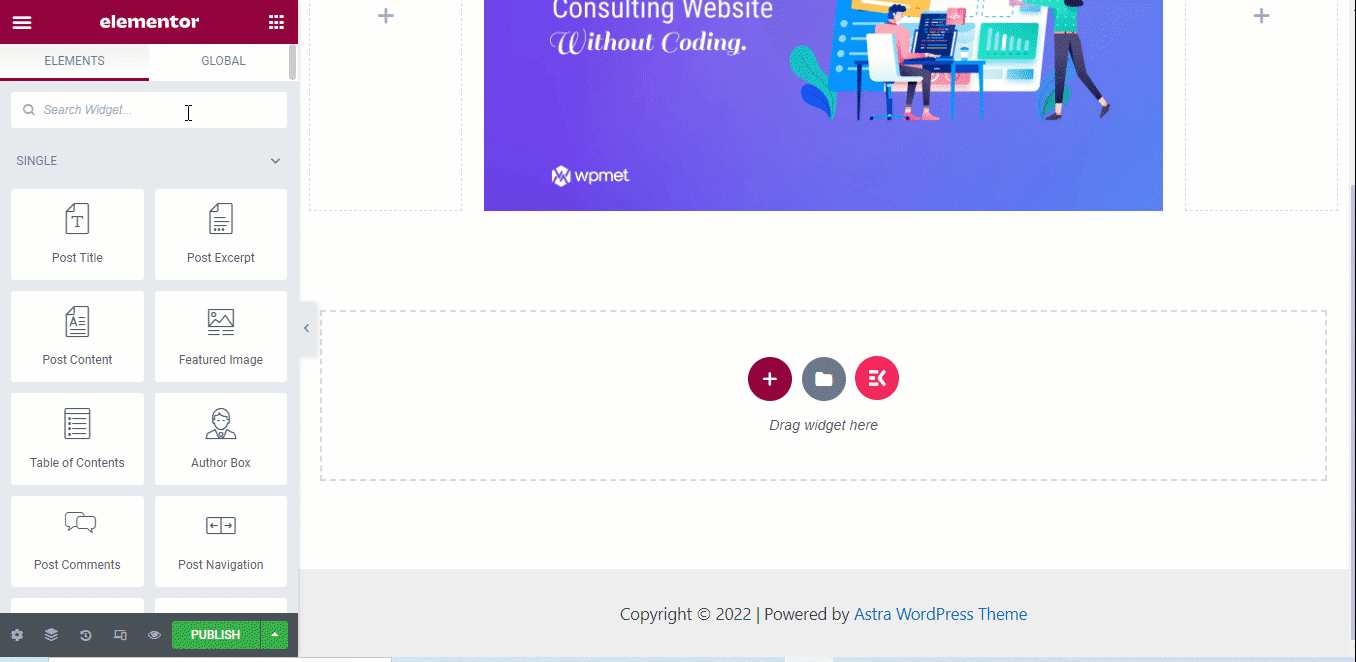
On the Elementor Editor's Content tab, you can set the layout as Default or Inline. You can edit or delete Author, Date, Time, and Comments options. You can also add a custom field to the Post Info widget by clicking on the + ADD NEW button.
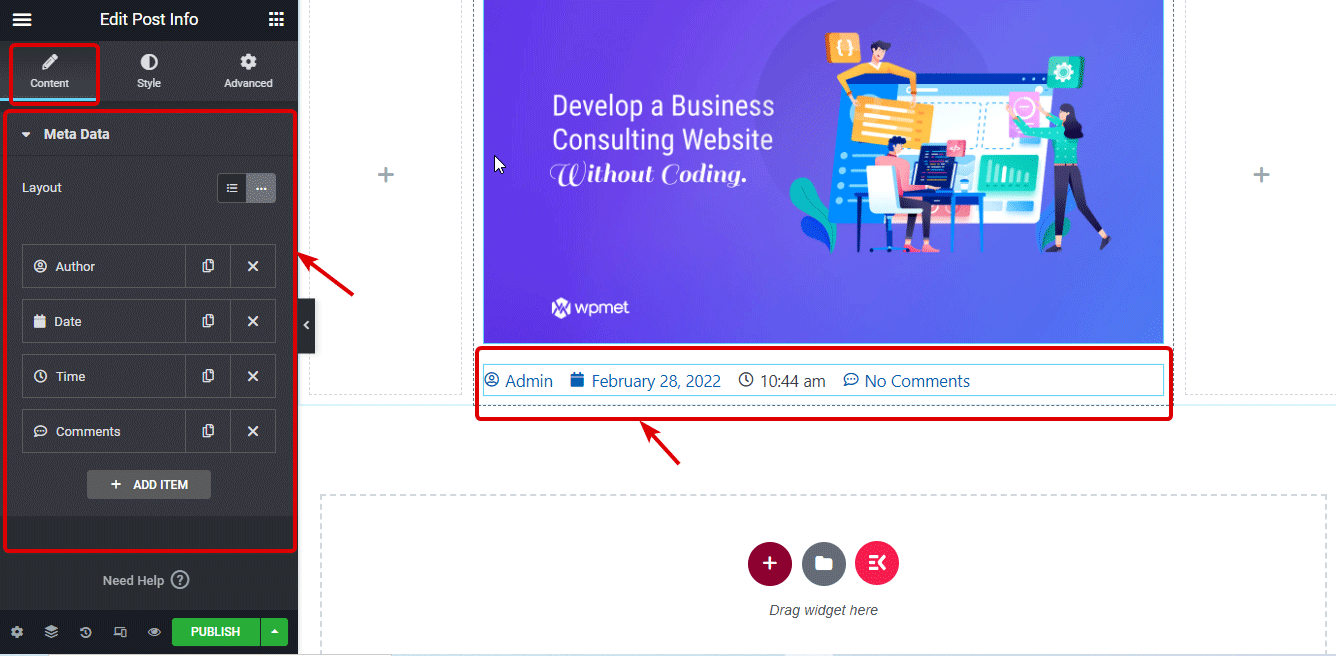
Again, move on to the Style tab to customize style settings like space between lists, alignment, icon color and size, text color, and typography.
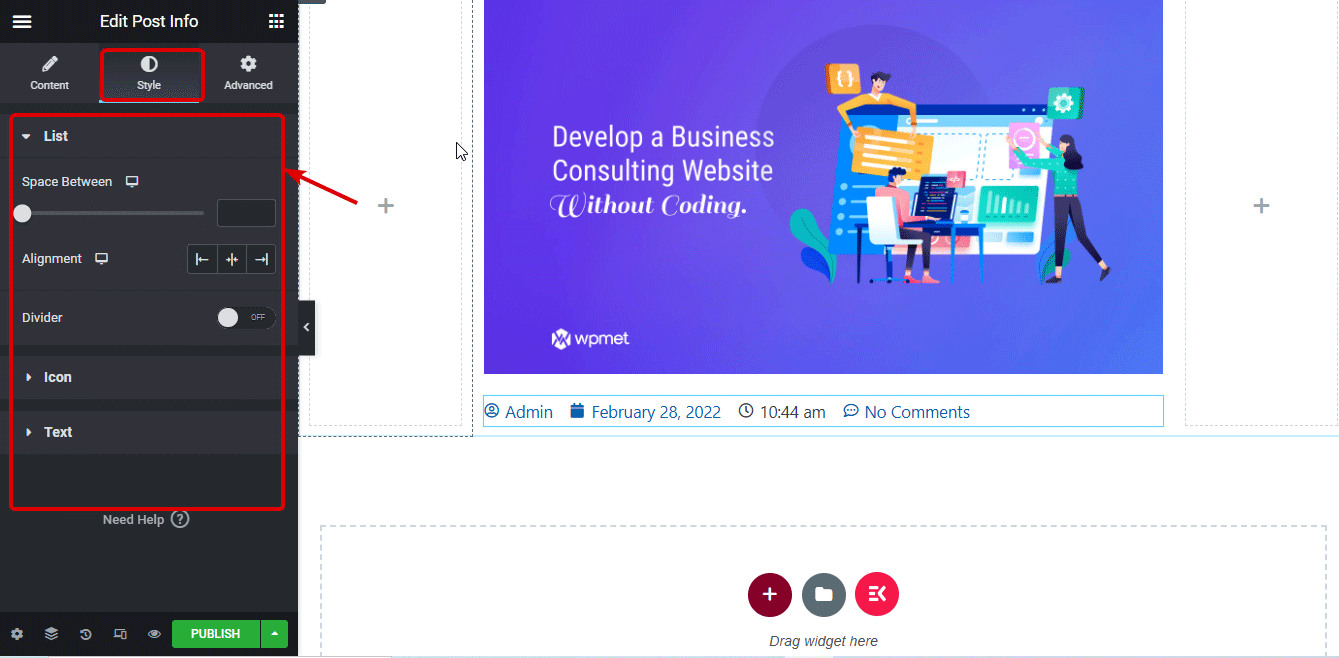
Step 5: Drag and Drop Post Title Widget and Customize
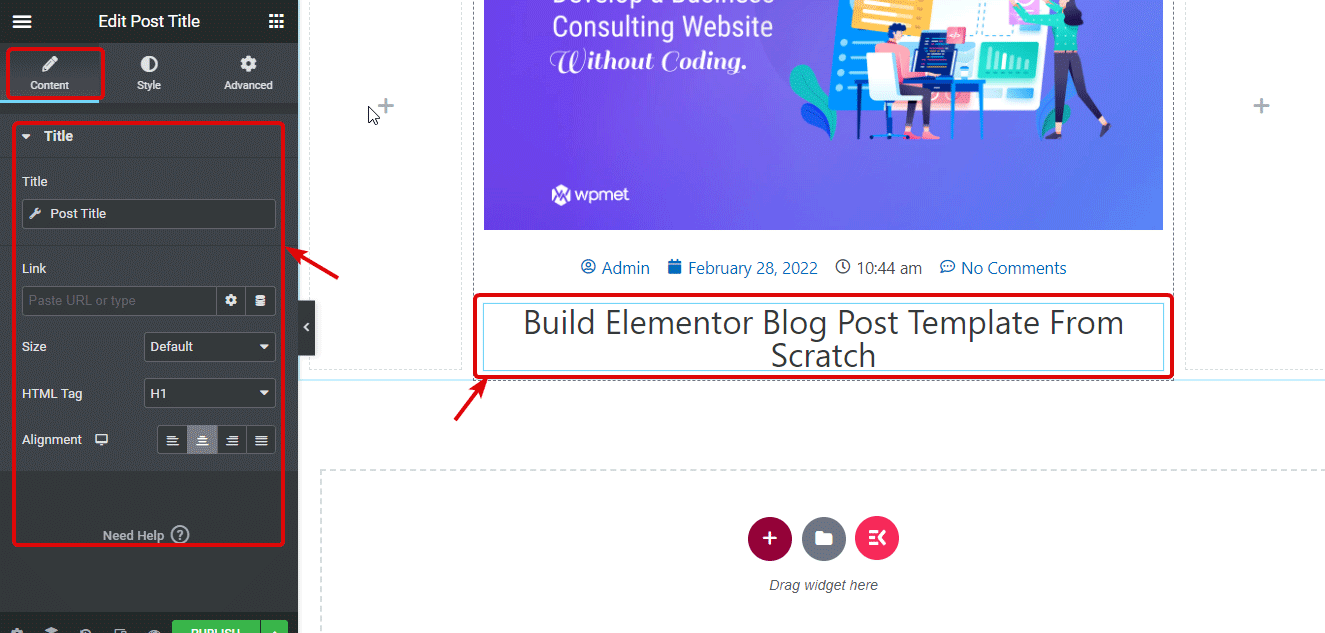
Now, search for the Post Title widget and drag and drop it below the Post Info widget.
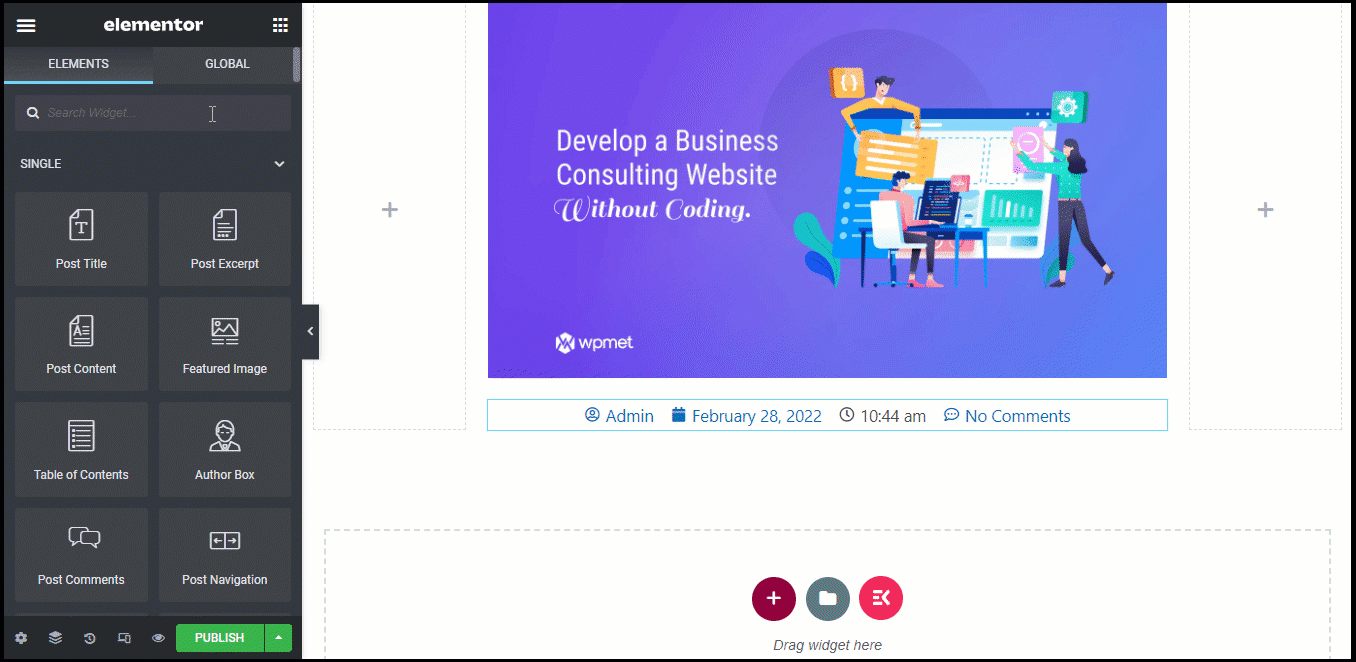
You can customize the size, HTML tag, and alignment of the Post Title tag.
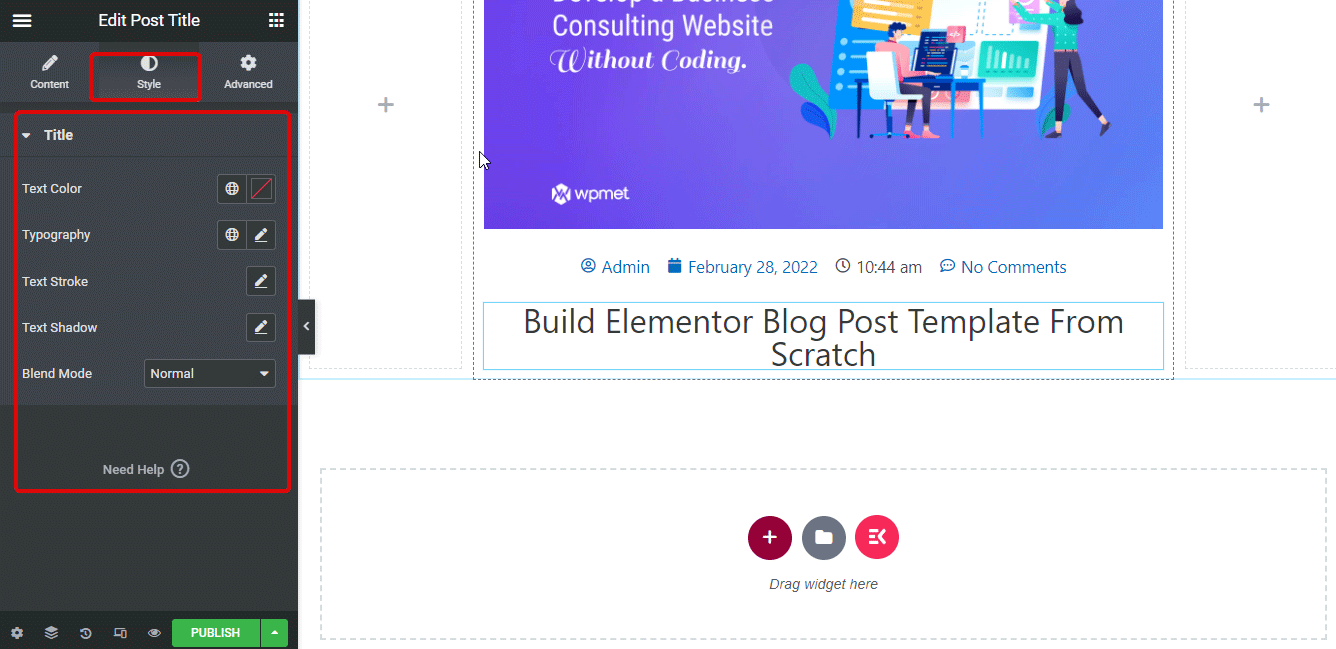
On the Style tab, you will find options to customize Text Color, Typography, Text Stroke, Text Shadow, and Blend Mode.
Step 6: Add and Customize the Post Content Widget
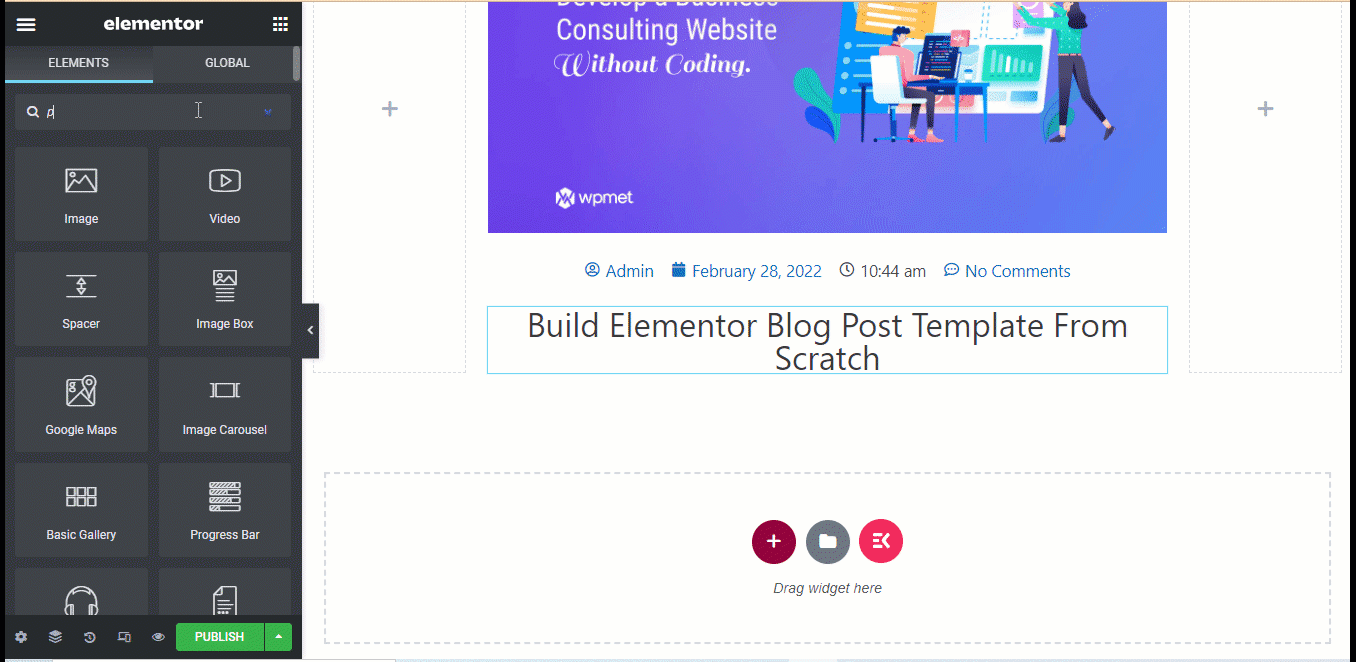
Now, drag and drop the Post Content widget. The Post Content widget represents the main body content of your blog post.
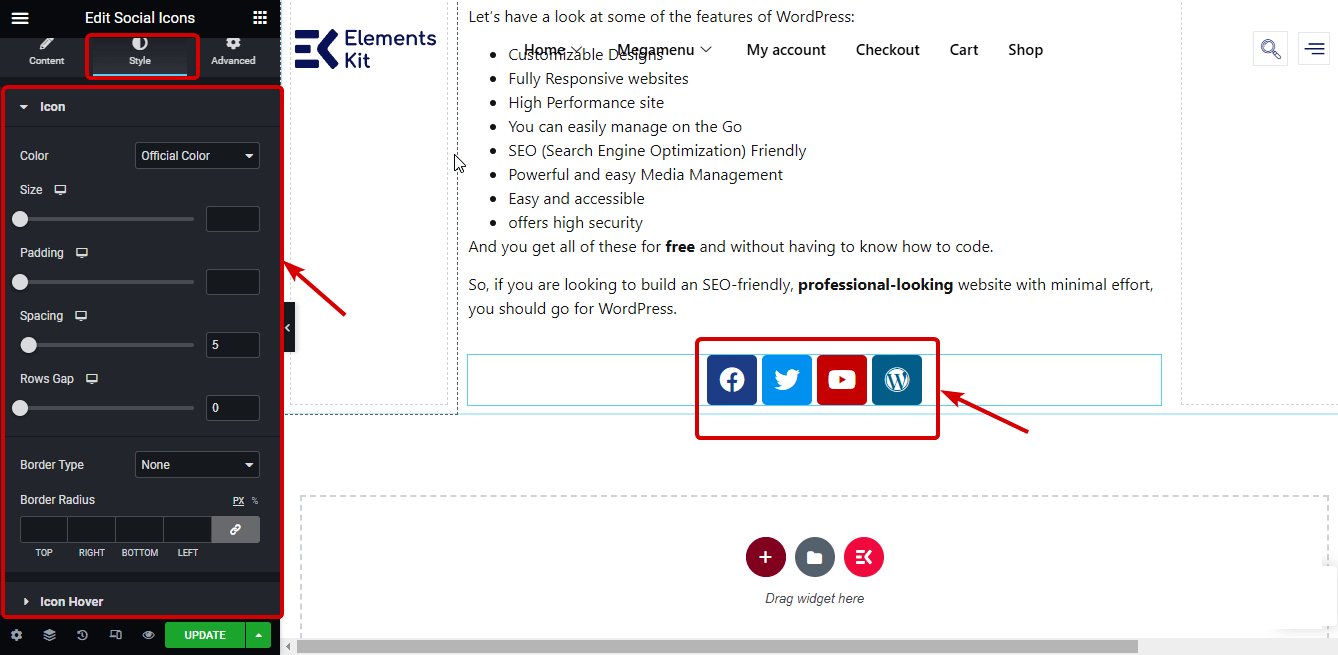
Step 7: Drag and Drop the Social Icons Widget to Add a Social Share Option
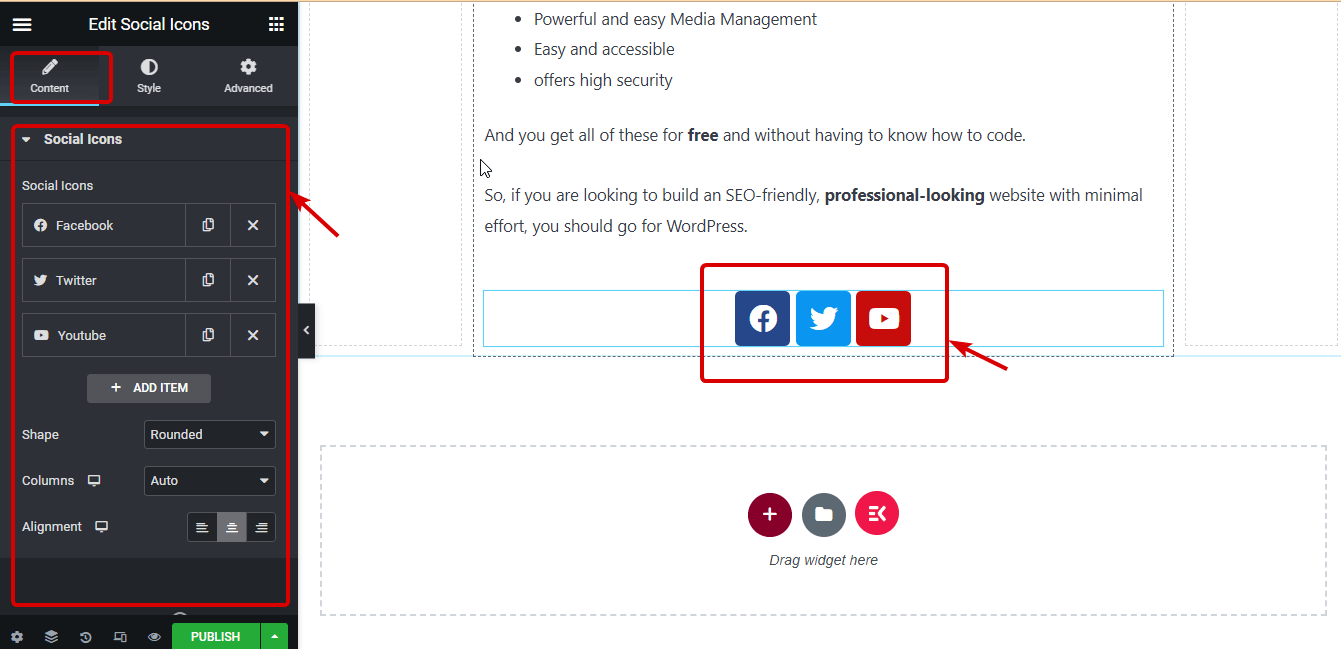
After the post content, add the Social Icons widget by dragging and dropping it into the page. Social Icons will provide options for readers to share your blog on different social platforms.
You can add or delete as many social icons as you want. In addition, you can customize the shape of the icons, the number of columns they should show up in, and their alignment. You can also customize the specific social platform icon, color, and redirection link for each of the social icons.
Navigate to the Style tab to change the icon size, color, padding, spacing, and border type.
Step 8: Add the Author Box Widget and Customize the Settings
Search for the Author Box widget, and drag and drop it after the Social Icons. You can also add a custom author if you want from the source dropdown. You can choose to show/hide the profile picture, display name, and biography. You can also customize other settings such as HTML tag, link, layout, and alignment.
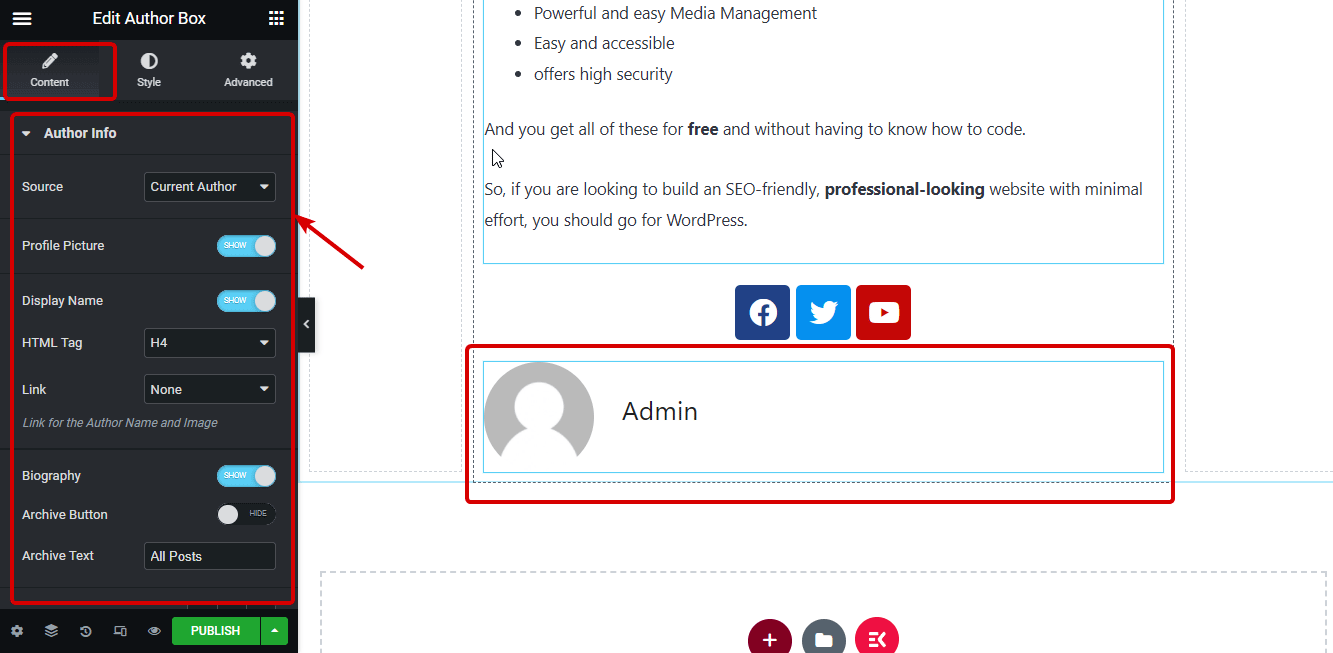
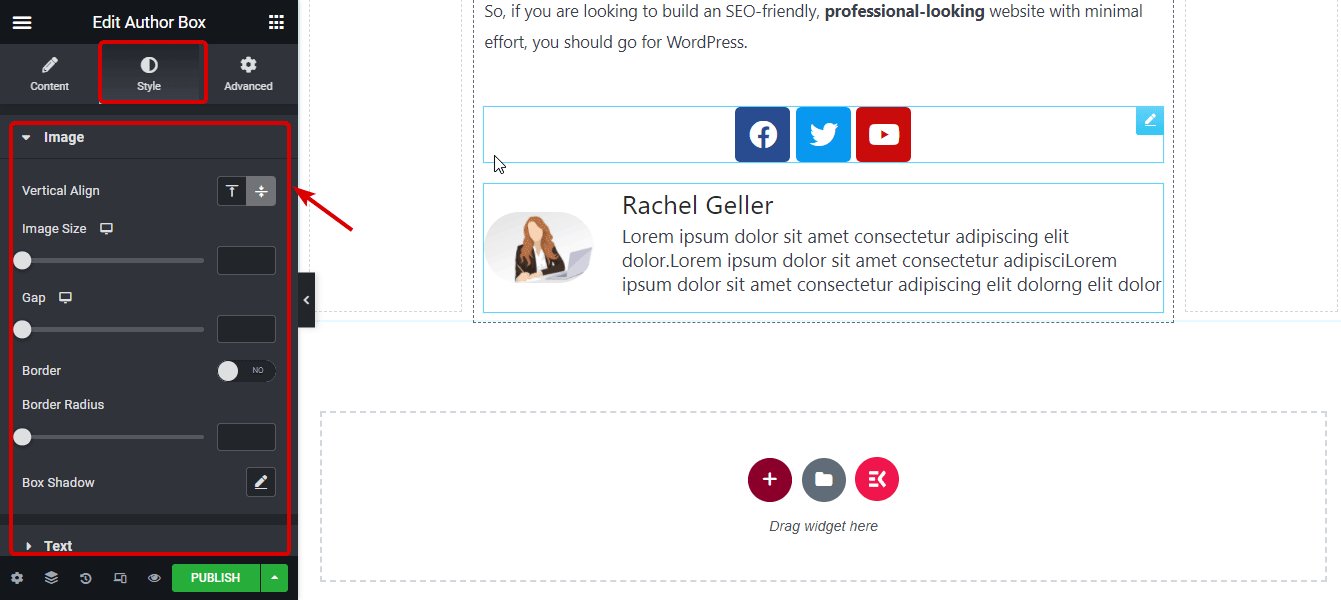
Navigate to the Style tab to customize options such as image size, borders, color, and typography of the author's name, biography, and social links.
Step 9: Add Post Navigation Widget for Pagination
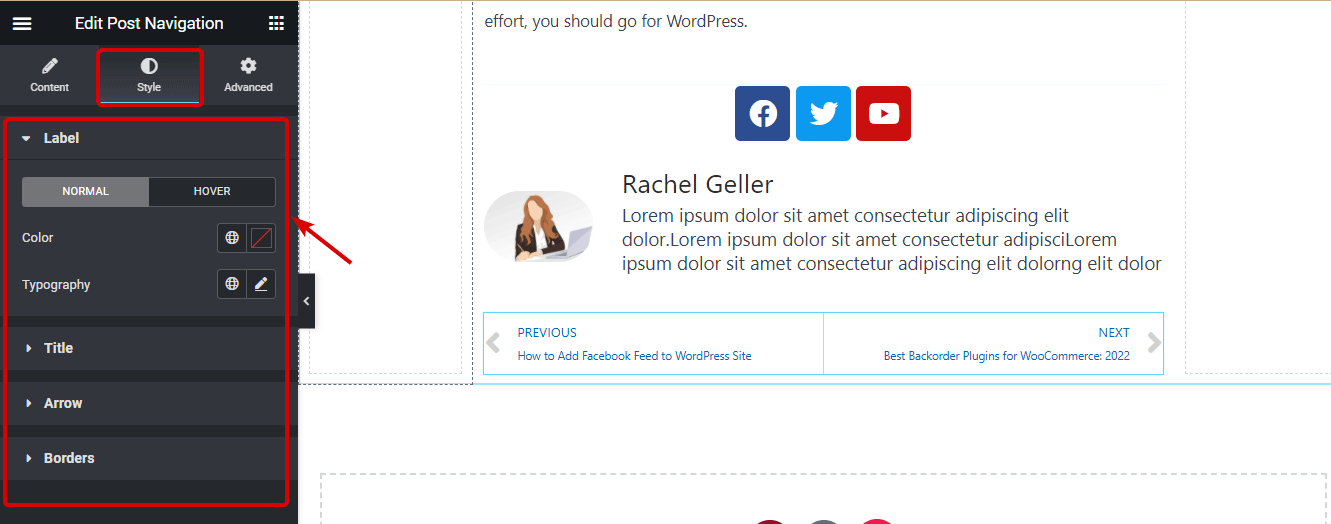
The Elementor Post Navigation widget will offer pagination navigation options to readers so they can easily switch between different blog posts. To add the post navigation widget, search for it on the editor panel and then drag and drop it below the Author Box widget.
You can either show or hide the pagination label or arrow signs. You get around 8+ design options for arrows. You can also customize the previous and next label text.
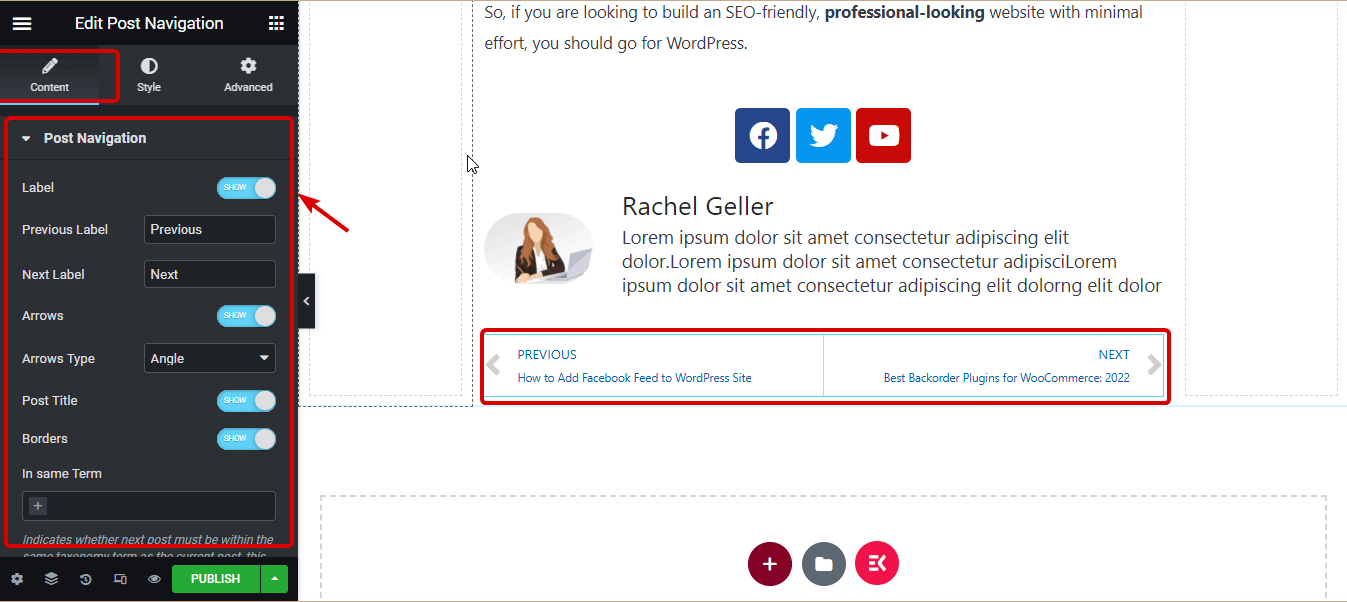
You can change the color and typography of the label, title, arrow, and borders for both normal and hover states.
Step 10: Drag and Drop the Posts Widget to Display Related Posts
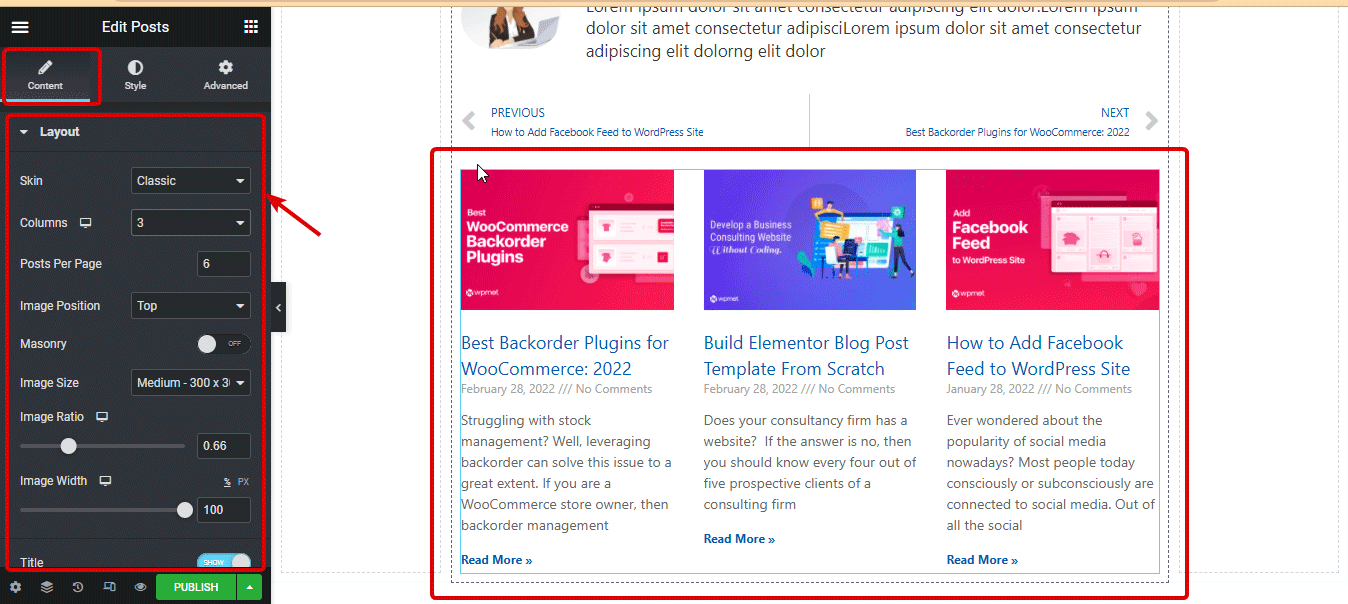
To showcase related posts, we are going to use the Elementor Posts widget. Drag and drop the Posts widget after the Post Navigation widget. With this widget, you can change the skin color, set the number of columns, the number of posts per page, the image position, and many more settings. You can also change the style of the layout box, image, and content.
Step 11: Add Post Comments Widget
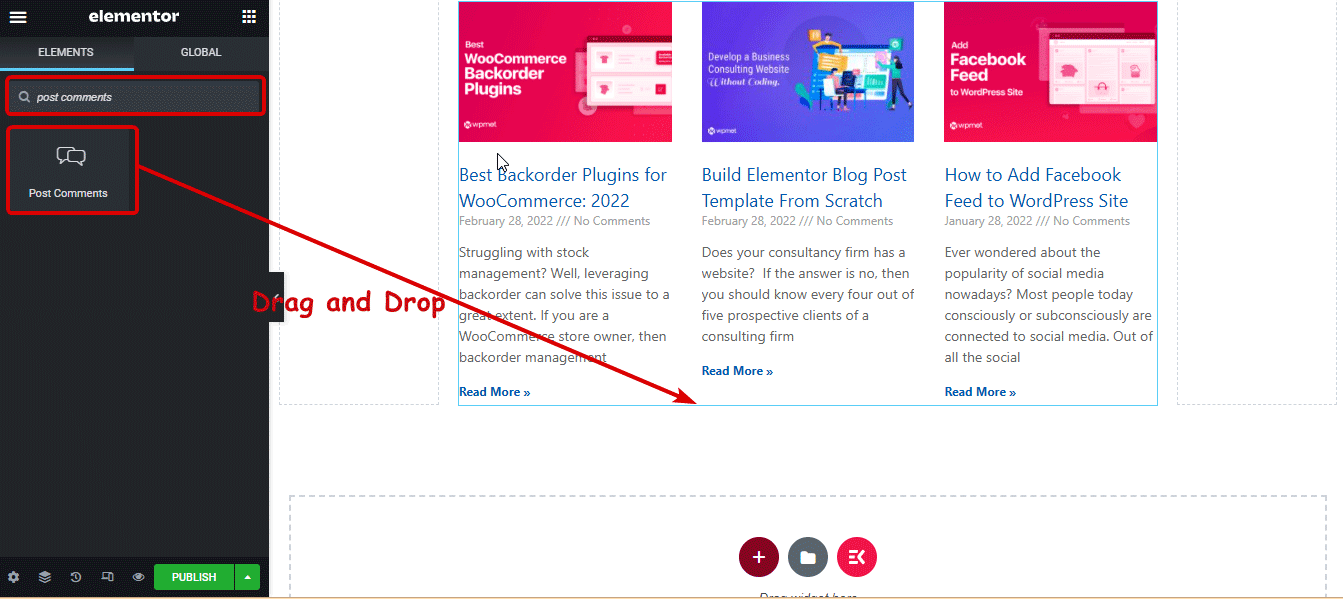
To give your users the option to comment on your posts, you need to add the Post Comments widget. Search for the Post Comments widget and drag and drop it below the related posts widget.
Step 12: Update and View the Elementor Custom Blog Page Template
Now that all the design work is done, click on the Update button at the bottom of the screen. If the publishing settings window shows up, click on Save & Close.
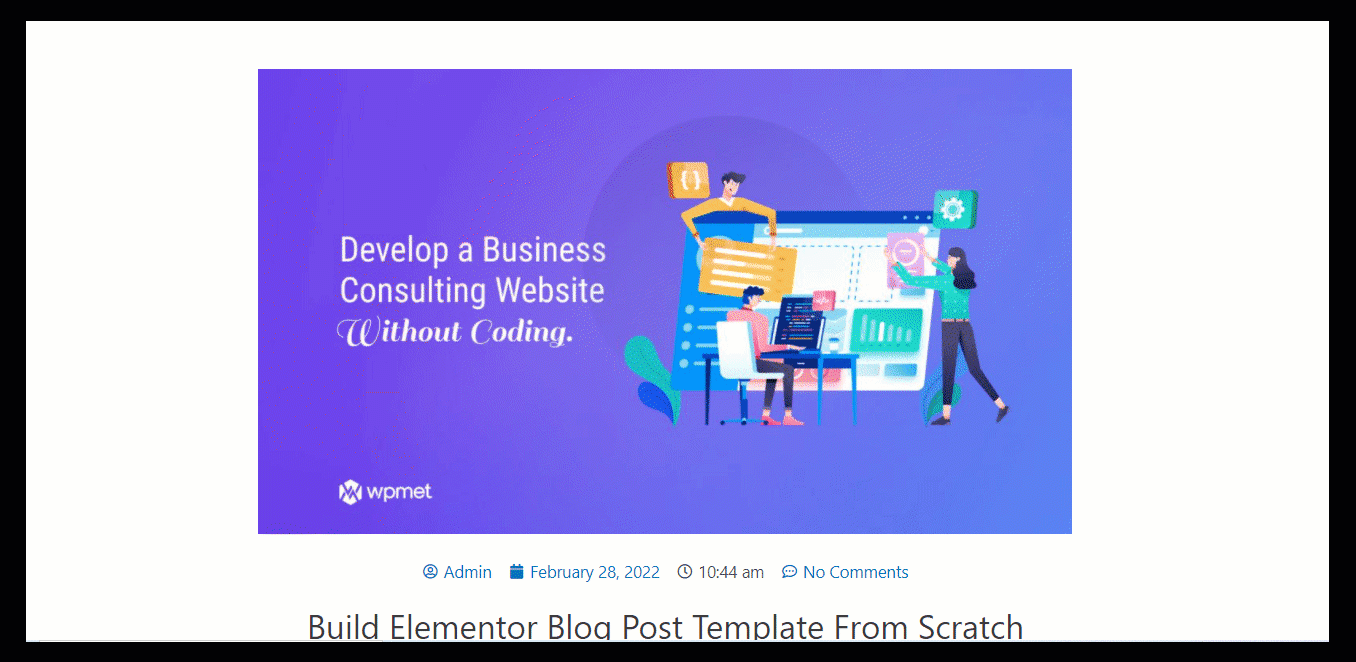
Here is the preview of the custom Elementor blog template we just created:
If you found the method described above too time-consuming, you can opt for the second method mentioned below, where you don’t have to build and design each section from scratch.
How to Create the Single Post Page Using a Premade Elementor Blog Template
If you plan to use a prebuilt template for your Elementor custom blog page, you can do it in just 3 steps. Let’s check how:
Step 1: Create a New Single Blog Post Template From the Dashboard
Like the first method, you need to create a new single blog template. For more details on how to create the new template, scroll up and check Step 1 of the first method.
Step 2: Choose a Premade Elementor Single Post Template
Once you click on Create Template, you will see the Elementor library window with many custom single post templates. Here, you can choose any of the single post blocks you like. Hover over the template of your preference and click on Insert.
Step 3: Publish and Save Your Template
Once the template loads, click on the Publish button to save your new blog template.
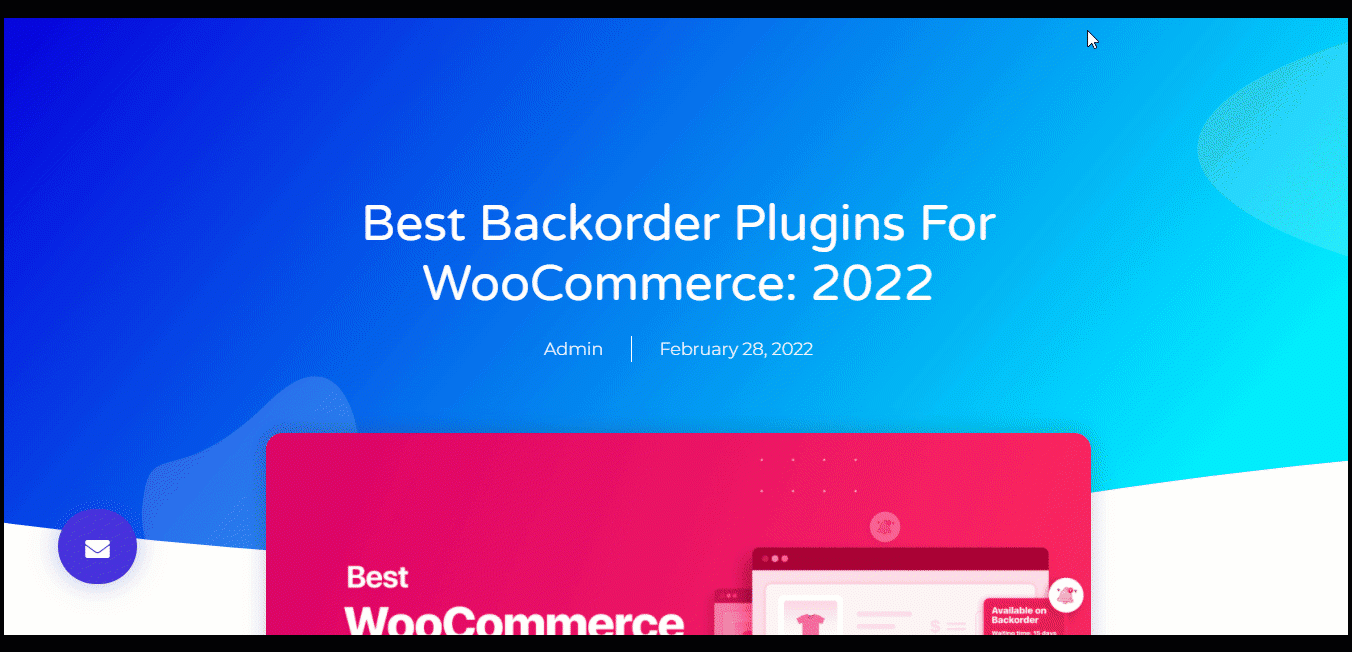
Here is a final look at a blog post utilizing a premade single post template:
How to Create an Elementor Latest Posts Page with ElementsKit
Now that you have an attractive single-post template, it’s time to make a custom blog listing page so all your blogs are displayed in an eye-soothing and user-friendly way. Let’s have a look at how you can create a custom Elementor's latest posts feed with ElementsKit.
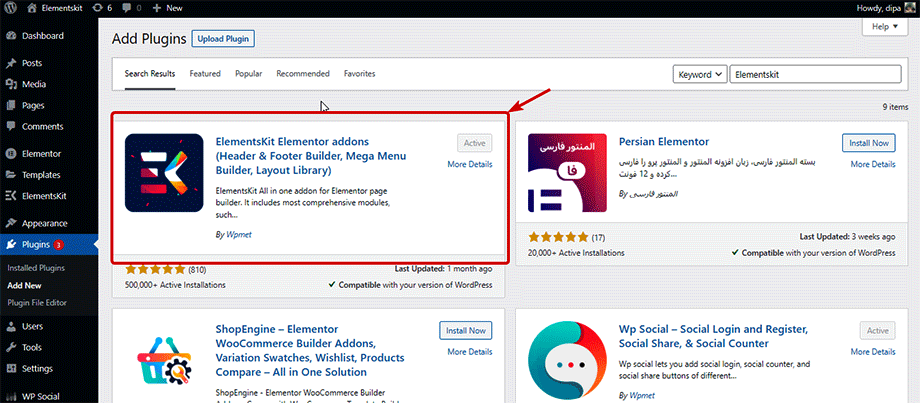
Step 1: Install and Activate ElementsKit
To create a stunning blog listing page, along with the Elementor page builder, you will need ElementsKit. ElementsKit is an all-in-one plugin for Elementor with 85+ widgets and modules to make web development easier than ever.
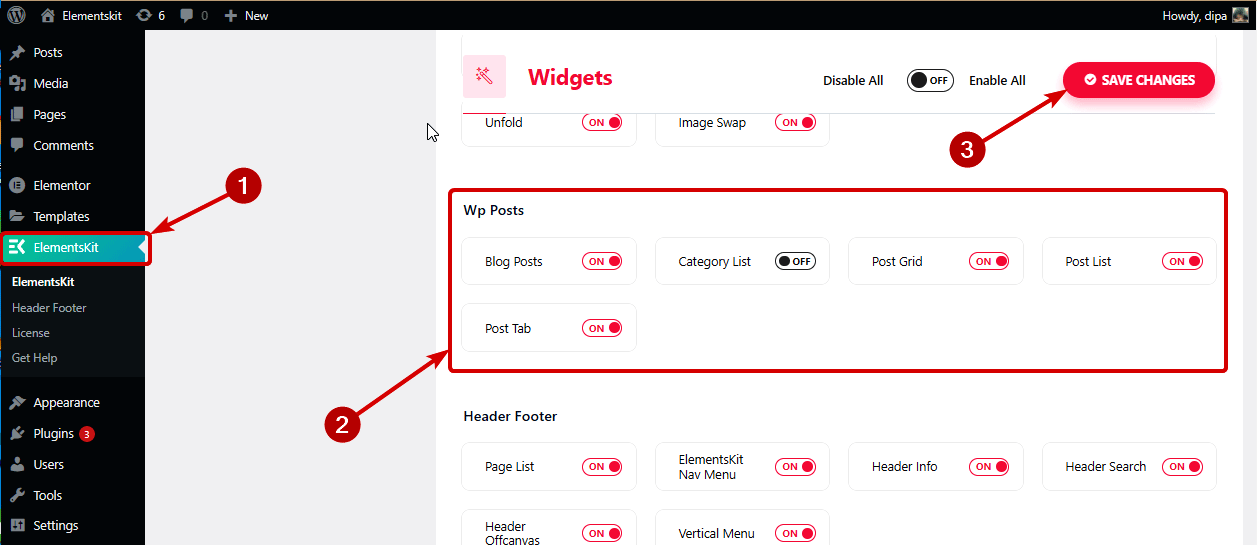
Step 2: Enable Posts List-Related Widget
Once activated, you need to turn on the post-related widget to build your post listing page. ElementsKit provides a number of widgets to display your blog lists, which include Blog Posts, Post Grids, Post Lists, Post Tabs, etc. You can enable the exact widget you want to use in the ElementsKit dashboard settings.
Step 3: Add the Widget and Customize
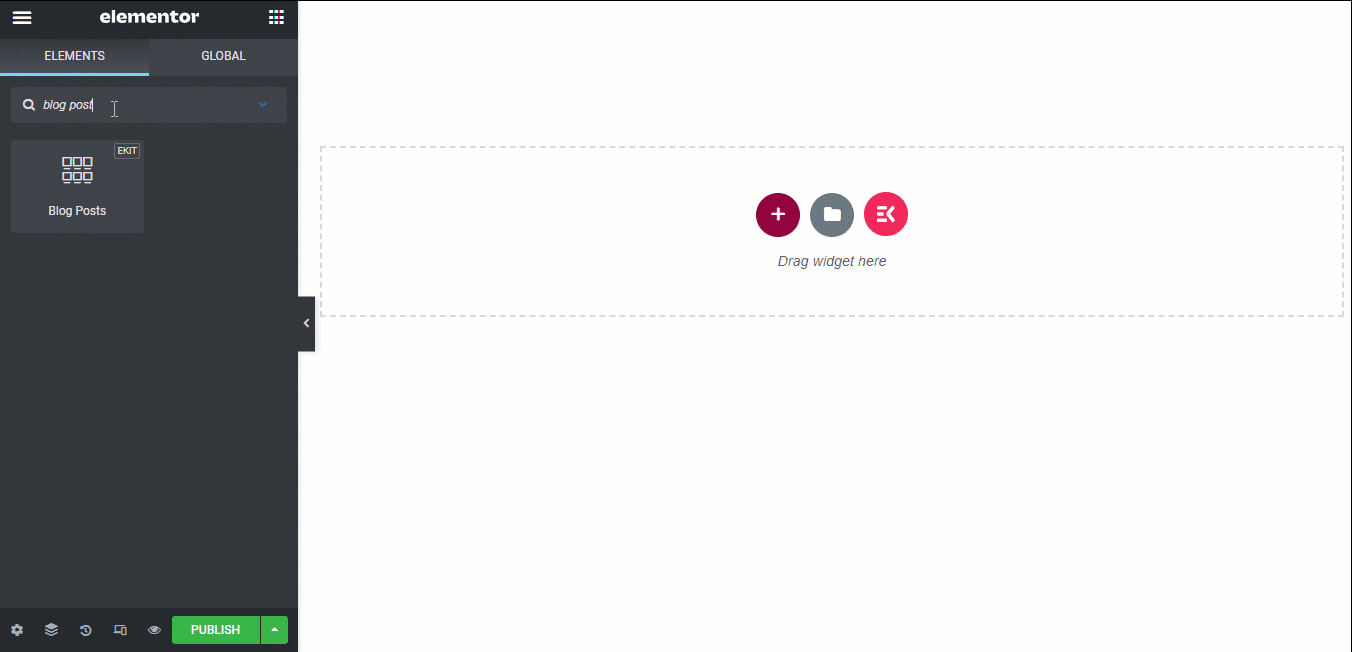
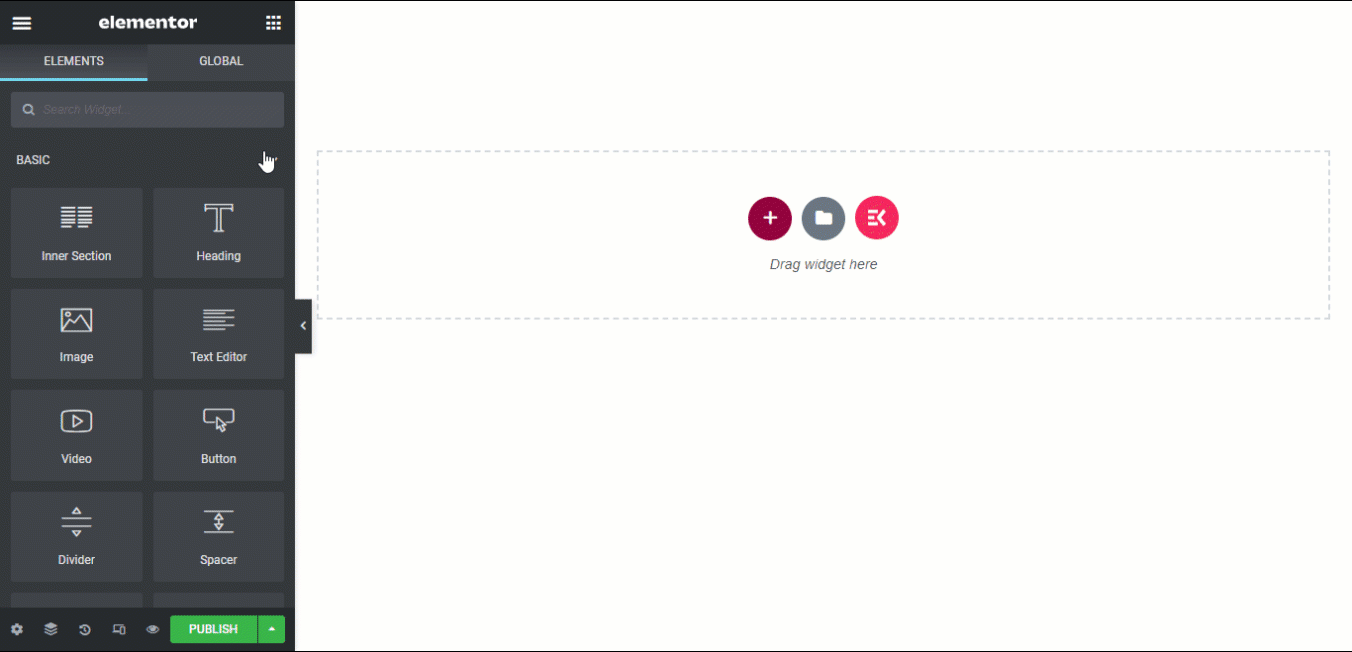
Now, go to your blog archive or listing page in Elementor, search for the enabled widget, and simply drag and drop it into place. Once the widget loads, you can customize the related settings to personalize your listing. Let’s look at what your layout will look like with a few of the ElementsKit widgets and their customization options:
Blog Posts
Using the Blog Posts widget, you can display your blogs in Block format, Grid with a thumb, and Grid without a thumb design. You can also set the number of posts to show per row, enable/disable pagination, and customize many more options.
Post Grid
With the Post Grid widget, you can customize which category blogs you want to display in your blog list. You can also choose the number of posts to display and the column numbers each row should have.
Post Tab
With the Post Tab widget, you can dynamically display posts categorized under custom-labeled tab headers, allowing readers to toggle categories on the fly. You can also choose the number of posts to display and customize columns.
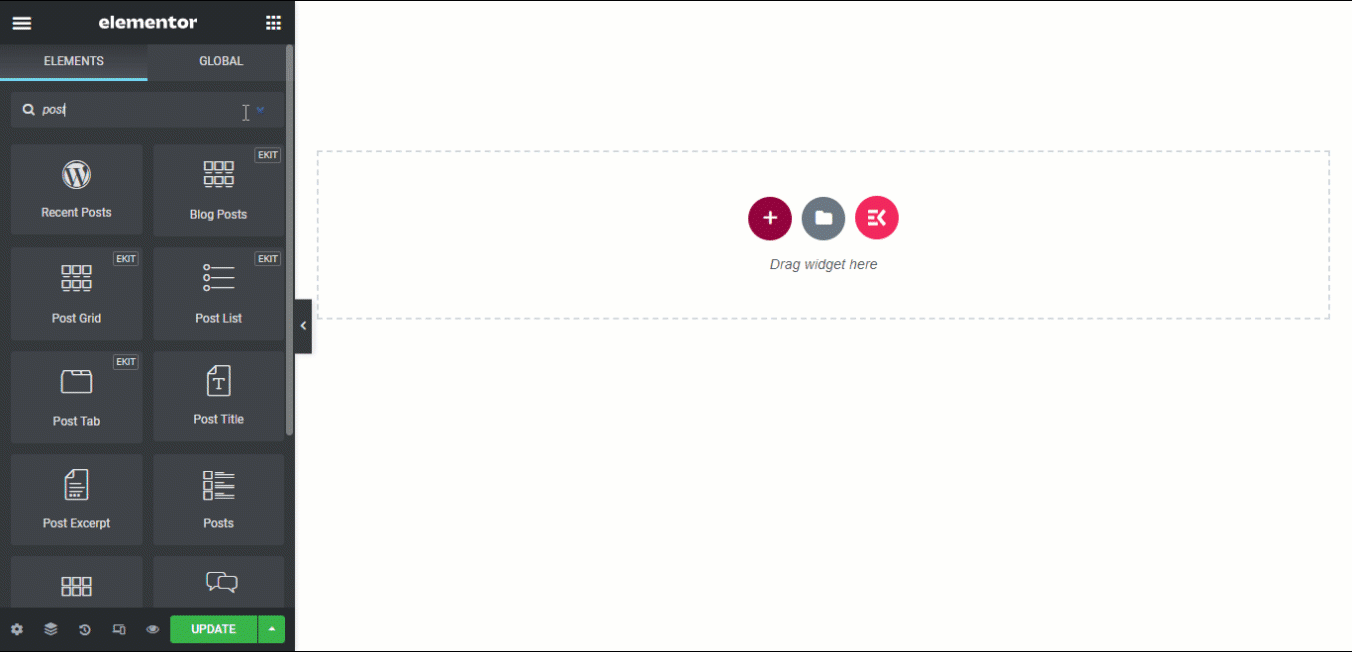
Once you choose your widget and make customizations according to your choice, click on the Update button to publish. Now you have a page that displays your recent blog posts in an enticing way!
Final Words
We have tried our best to provide you with an easy tutorial on how to create a custom Elementor blog post template in two ways. We hope you found the blog helpful to build your custom Elementor blog template. You can follow the steps and change the layouts as well as designs according to your choice.
And don’t forget to give an extraordinary touch to your blog list page with ElementsKit widgets. ElementsKit is the perfect complement to Elementor. Make sure to check out all the amazing widgets this addon has to offer.
Related Posts

WordPress Multisite
WordPress Multisite: What It Is, How to Activate and Manage It

How to Enable WordPress Maintenance Mode
Website maintenance mode helps you keep your WordPress site functional and professional while making updates or fixing issues. Learn different methods to enable under-construction mode and ensure a smooth experience for visitors until your site is ready.
Setup & Install
Installing WordPress is a quick and straightforward process that usually takes just a few minutes. Follow these simple steps to set up WordPress on your website and get started with building your site.

How To Use Ajax in WordPress
Ajax makes WordPress websites more interactive by enabling real-time updates without reloading the page. With the help of Ajax-powered plugins, you can easily add dynamic features that improve user engagement and create a smoother browsing experience.