
Create Custom Taxonomies in WordPress
WordPress taxonomies help organize your content, making it easier for visitors to navigate your site. This guide explains what taxonomies are and shows you how to create and manage custom WordPress taxonomies step by step.
How to Create Custom Taxonomies in WordPress
WordPress content is usually grouped into distinct categories. You will assign most of your posts and pages to a 'taxonomy' that already exists - a category or tag. A custom WordPress taxonomy may also be necessary.
Fortunately, this is an easy process. It will be easier for visitors to find what they're looking for if you know how to create and update taxonomies.
The purpose of this article is to show you how to create a custom WordPress taxonomy. In order to better understand a taxonomy, let's first define it.
What Is a WordPress Taxonomy?
Taxonomies are used to organize content and posts on WordPress. There are two types of categories: categories and tags. Tags (similar to hashtags) describe what a post contains, while categories group similar posts together.
Content is organized using these taxonomies on most WordPress websites. Both you and your visitors will benefit from this since it makes it easier for everyone to find what they are looking for. Furthermore, grouping your content this way can even benefit your site's Search Engine Optimization (SEO).
How to Create a Custom Taxonomy With a Plugin
You can organize your content with categories and tags, but what if you want to do more? To create a custom taxonomy in WordPress, you can use both user- and developer-friendly methods.
Let's start with the plugin approach. Choosing a tool is the first step. Based on its user reviews and ease of use, we will use the Pods plugin. Custom Post Type UI is one option, but there are plenty of others.
Step 1: Add a New Blank Taxonomy and Populate the Fields
In order to begin using the plugin, you need to install and activate it. Then, go to your WordPress dashboard and click Pods Admin > Add New:
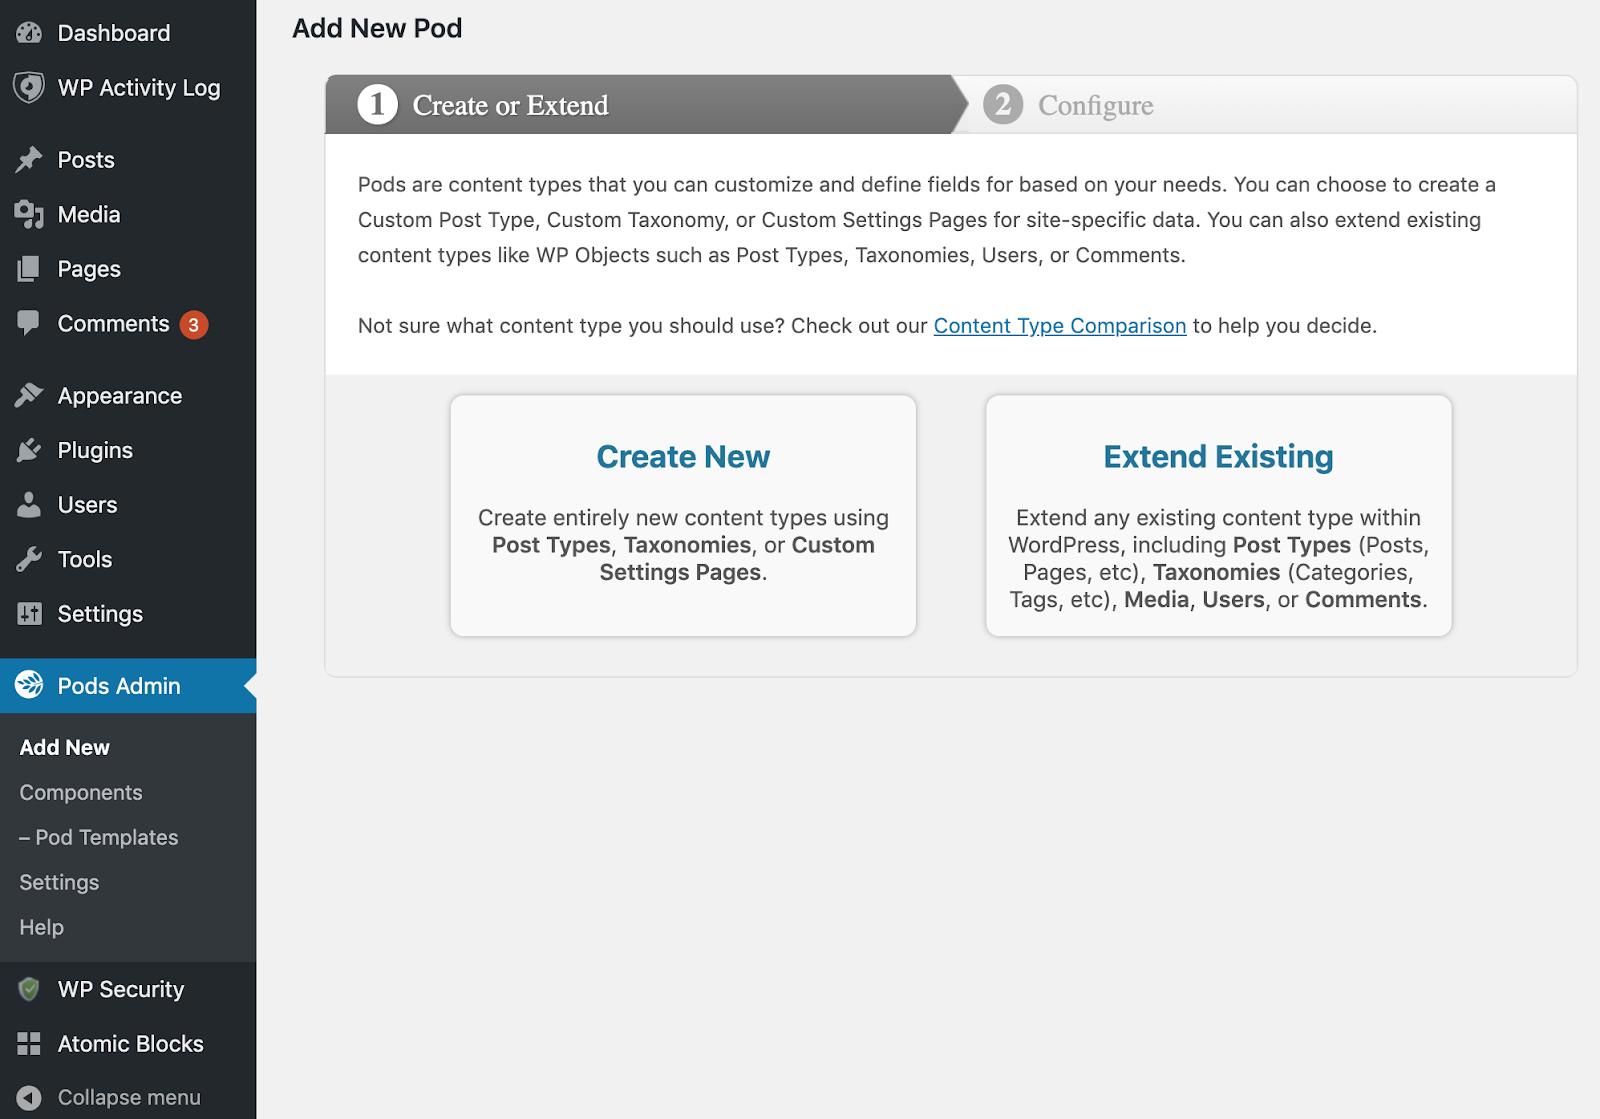
In the Content Type drop-down menu, select Custom Taxonomy (such as Categories or Tags). For your new taxonomy, you'll also need a singular and plural name (for example, "Recipe" and "Recipes", respectively).
The Advanced menu is hidden, but those options aren't necessary. The next step is to go to the Configure screen after filling out the necessary fields.
Step 2: Assign and Save Your Taxonomy
You will then see a success message on the Edit Pods screen:
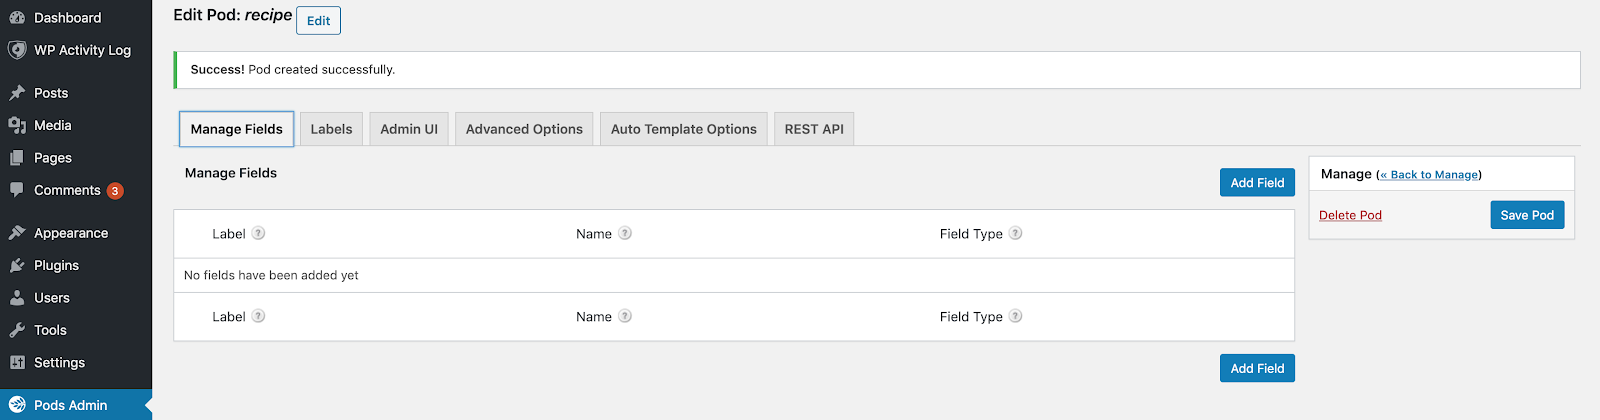
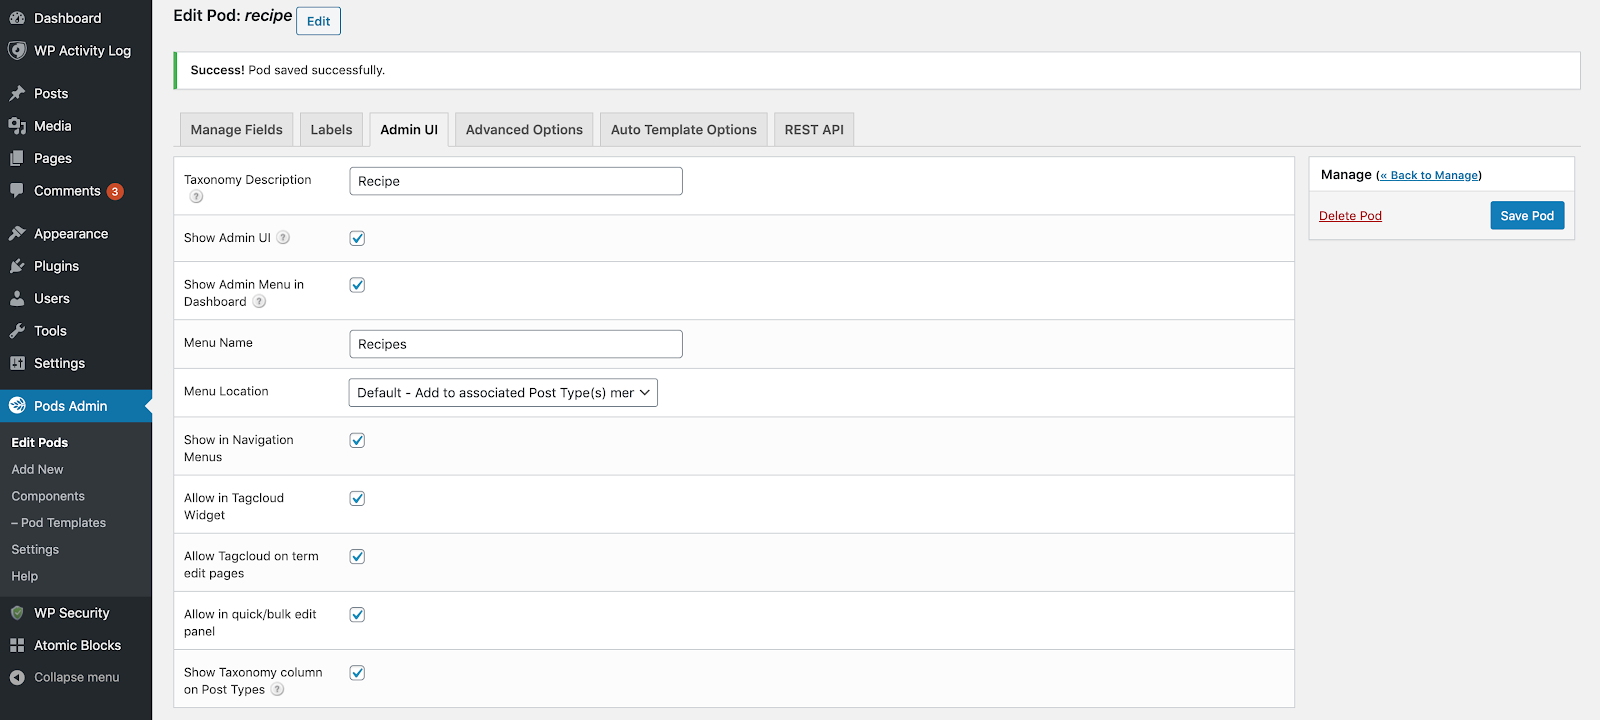
You can further customize your taxonomy on this screen. Assign it to a custom post type or make it hierarchical like a category. Like categories and tags, our new taxonomy will be displayed under the Posts menu.
The same can be accomplished by populating the Menu Name field on the Admin UI screen:
We'll check Posts (post) in the Associated Post Types menu under the Advanced Options tab:
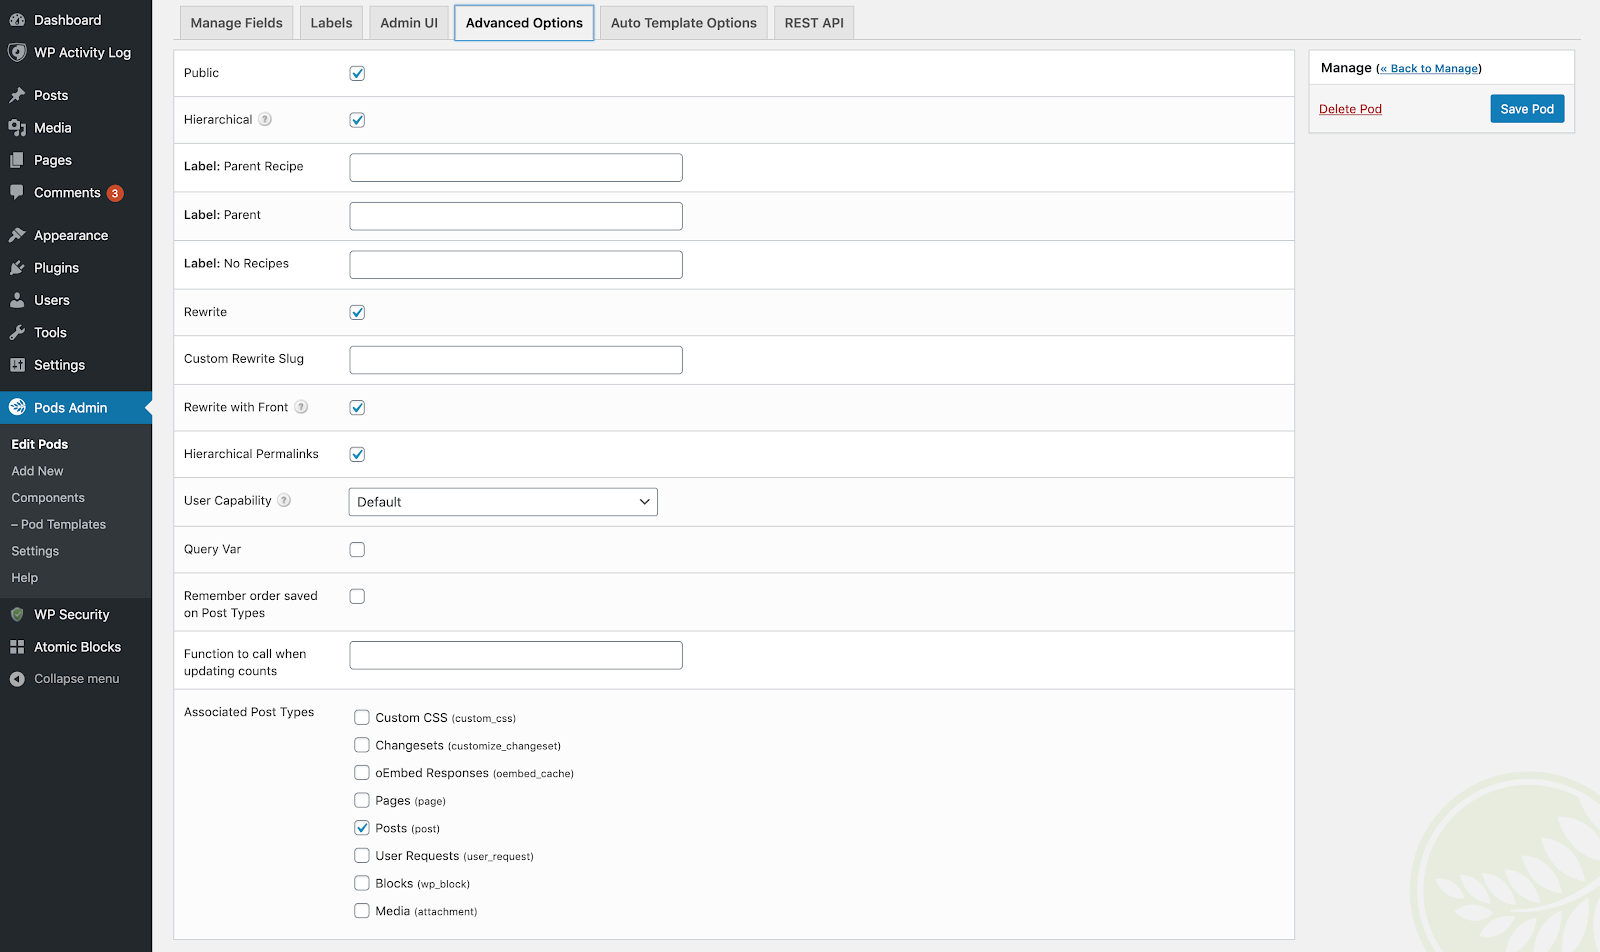
Save your changes, and you’ll see your new taxonomy alongside the others, ready to use:
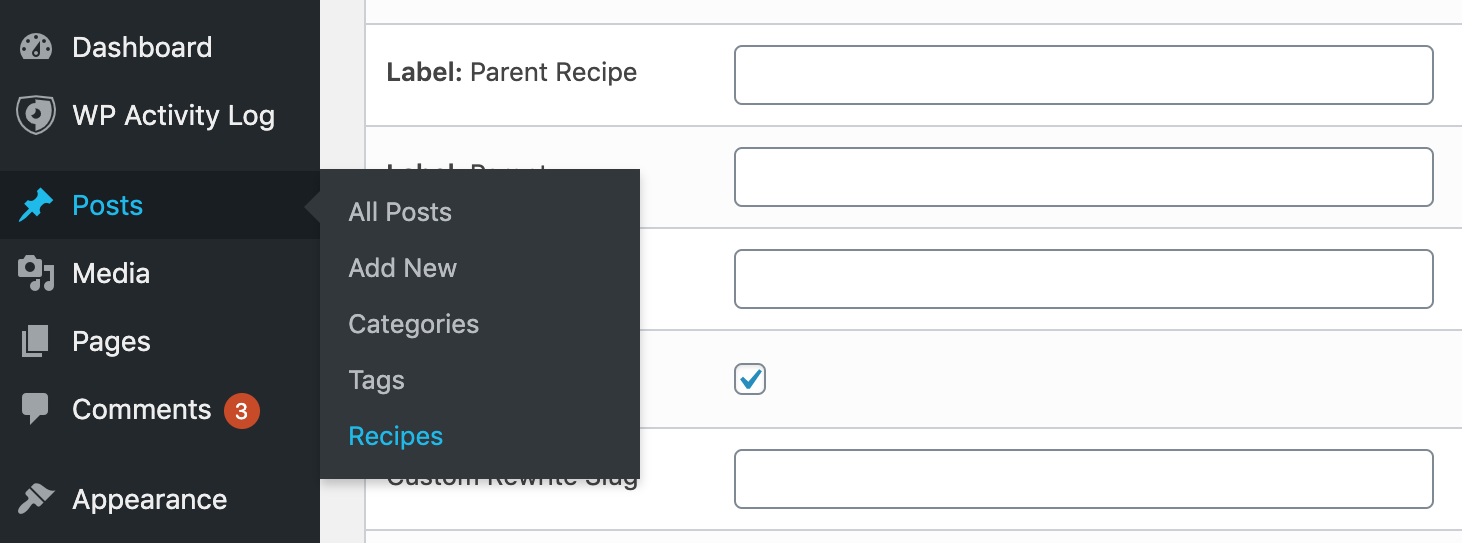
This completes the setup of your new taxonomy.
How to Create a Custom Taxonomy With Code
You can create your custom taxonomies with code if you don't want to use a plugin or if you're a developer. If you have previous experience navigating WordPress' core files, the steps below will be simple to implement.
Step 1: Determine If You Want a Hierarchical or Non-Hierarchical Taxonomy
The first thing you need to decide is whether your taxonomy will be hierarchical or not. A quick summary of the differences is as follows:
Hierarchical: As with categories, you can have parent and child terms. There could be a parent term called Beginners, and child terms such as Plugins, Themes, and Marketing.
Non-Hierarchical: This allows you to assign only one term to a piece of content, without allowing you to create child terms.
The code you'll need depends on your preference, so make sure you choose wisely.
Step 2: Edit Your functions.php File
No matter what your taxonomies are, you'll need access to your functions.php file. Before you begin:
- Before making any changes to your website's core files, back it up.
- When updating themes and WordPress itself, use a child theme to preserve your changes.
- Learn Secure File Transfer Protocol (SFTP) if you need it, and have an SFTP client handy (such as FileZilla or Cyberduck).
After that, you can access your WordPress website through SFTP and locate your functions.php file. Your primary theme folder should contain it. Once you've found the file, open it and add one of the following code snippets to the bottom, depending on whether you chose a hierarchical taxonomy or not.
Hierarchical Code Snippet:
// Hook into the init action and call create_book_taxonomies when it fires
add_action( 'init', 'create_subjects_hierarchical_taxonomy', 0 );

// Create a custom taxonomy name for your posts
function create_subjects_hierarchical_taxonomy() {
    // Add a new taxonomy and make it hierarchical, like Categories
    // Translate the GUI
    $labels = array(
        'name' => _x( 'Subjects', 'taxonomy general name' ),
        'singular_name' => _x( 'Subject', 'taxonomy singular name' ),
        'search_items' => __( 'Search Subjects' ),
        'all_items' => __( 'All Subjects' ),
        'parent_item' => __( 'Parent Subject' ),
        'parent_item_colon' => __( 'Parent Subject:' ),
        'edit_item' => __( 'Edit Subject' ),
        'update_item' => __( 'Update Subject' ),
        'add_new_item' => __( 'Add New Subject' ),
        'new_item_name' => __( 'New Subject Name' ),
        'menu_name' => __( 'Subjects' ),
    );

    // Register the taxonomy
    register_taxonomy('subjects', array('post'), array(
        'hierarchical' => true,
        'labels' => $labels,
        'show_ui' => true,
        'show_in_rest' => true,
        'show_admin_column' => true,
        'query_var' => true,
        'rewrite' => array( 'slug' => 'subject' ),
    ));
}
Non-Hierarchical Code Snippet:
// Hook into the init action and call create_topics_nonhierarchical_taxonomy when it fires
add_action( 'init', 'create_topics_nonhierarchical_taxonomy', 0 );

function create_topics_nonhierarchical_taxonomy() {
    // Add Labels to the GUI
    $labels = array(
        'name' => _x( 'Topics', 'taxonomy general name' ),
        'singular_name' => _x( 'Topic', 'taxonomy singular name' ),
        'search_items' => __( 'Search Topics' ),
        'popular_items' => __( 'Popular Topics' ),
        'all_items' => __( 'All Topics' ),
        'parent_item' => null,
        'parent_item_colon' => null,
        'edit_item' => __( 'Edit Topic' ),
        'update_item' => __( 'Update Topic' ),
        'add_new_item' => __( 'Add New Topic' ),
        'new_item_name' => __( 'New Topic Name' ),
        'separate_items_with_commas' => __( 'Separate topics with commas' ),
        'add_or_remove_items' => __( 'Add or remove topics' ),
        'choose_from_most_used' => __( 'Choose from the most used topics' ),
        'menu_name' => __( 'Topics' ),
    );

    // Register the non-hierarchical taxonomy similar to a Tag
    register_taxonomy('topics', 'books', array(
        'hierarchical' => false,
        'labels' => $labels,
        'show_ui' => true,
        'show_in_rest' => true,
        'show_admin_column' => true,
        'update_count_callback' => '_update_post_term_count',
        'query_var' => true,
        'rewrite' => array( 'slug' => 'topic' ),
    ));
}
In the above code, you'll need to replace the placeholder names with whatever you want for your custom taxonomy. Additionally, you can change the post_type within the register_taxonomy function. Generally, this will be Posts, but you may need to change it based on your needs.
After saving your changes, you'll need to do a little more work to display your taxonomies. We will first discuss how to create custom taxonomies in WooCommerce.
How to Create a Custom Taxonomy in WooCommerce
Good news! Creating a custom taxonomy for WooCommerce products follows almost exactly the same process as creating a plugin. In order to carry out those steps, you must have WooCommerce installed and products uploaded to your store.
All that needs to be changed is what happens when you reach the Advanced Options screen. Instead of checking Posts (post), check Products (product):
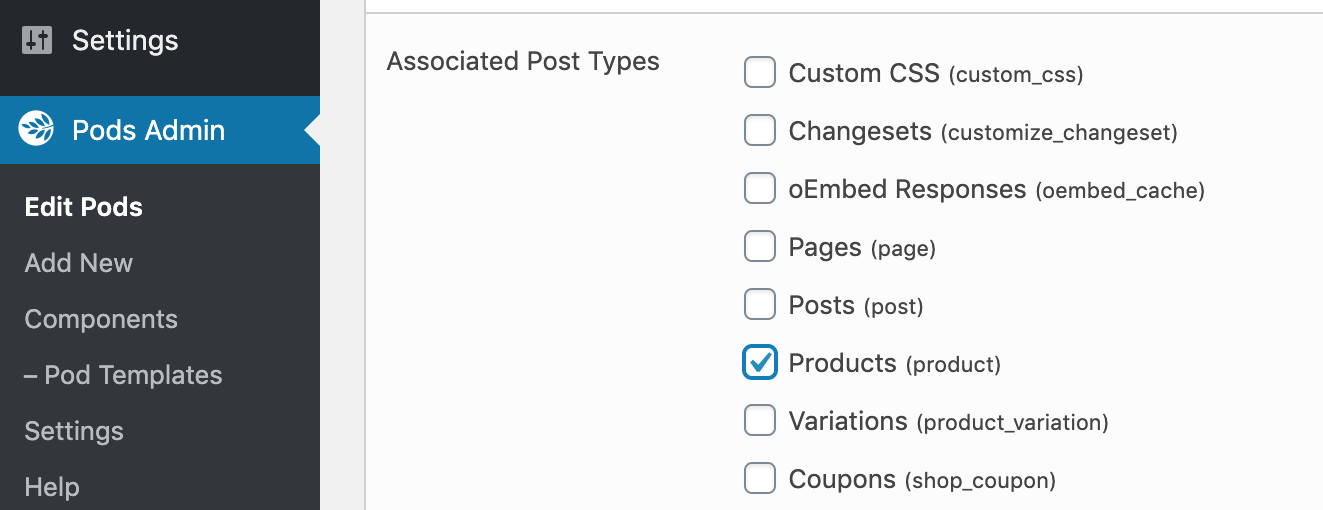
After you save your changes, the taxonomy will be ready to use. You must then learn how to display the taxonomies you have created.
How to Display Taxonomies
You should now be capable of displaying your taxonomies if you've come this far. If you haven't already backed up your site, make sure to do so now. The next set of steps involves adding some code and digging around in WordPress templates.
Step 1: Decide Where the Code Should Be Displayed
This step requires some knowledge of WordPress' template hierarchy. Because your custom taxonomies will be displayed in every template, you will need to add some code.
You may want to amend single.php, content.php, or another file within your theme's template-parts folder. Any template file could theoretically include your custom taxonomy.
You can find the template path within your browser by using the Which Template Am I plugin if you're having trouble finding the template a specific page uses. The final step is to add some code once you have made this decision.
Step 2: Add Code to Where You Want Your Taxonomy Displayed
You'll want to access your theme's files again via SFTP, and open the template you selected during the first step. Next, locate the spot in your file where the taxonomy should appear, and paste the following:
<?php the_terms( $post->ID, 'topics', 'Topics: ', ', ', ' ' ); ?>After saving your changes, you should see the taxonomy displayed on your WordPress site. The link should still be clickable and registered, even if the placement needs to be tweaked slightly.
Related Posts

Steps to take manual Backup and Restore for your wordpress site
Steps to take manual Backup and Restore for your wordpress site
Backup & Clone
Cloning a WordPress site lets you create an exact copy for testing, migration, backups, or development. This guide explains why site cloning is useful and walks you through the process step by step.
Wordpress SEO
Search engines are the biggest source of traffic for most websites.
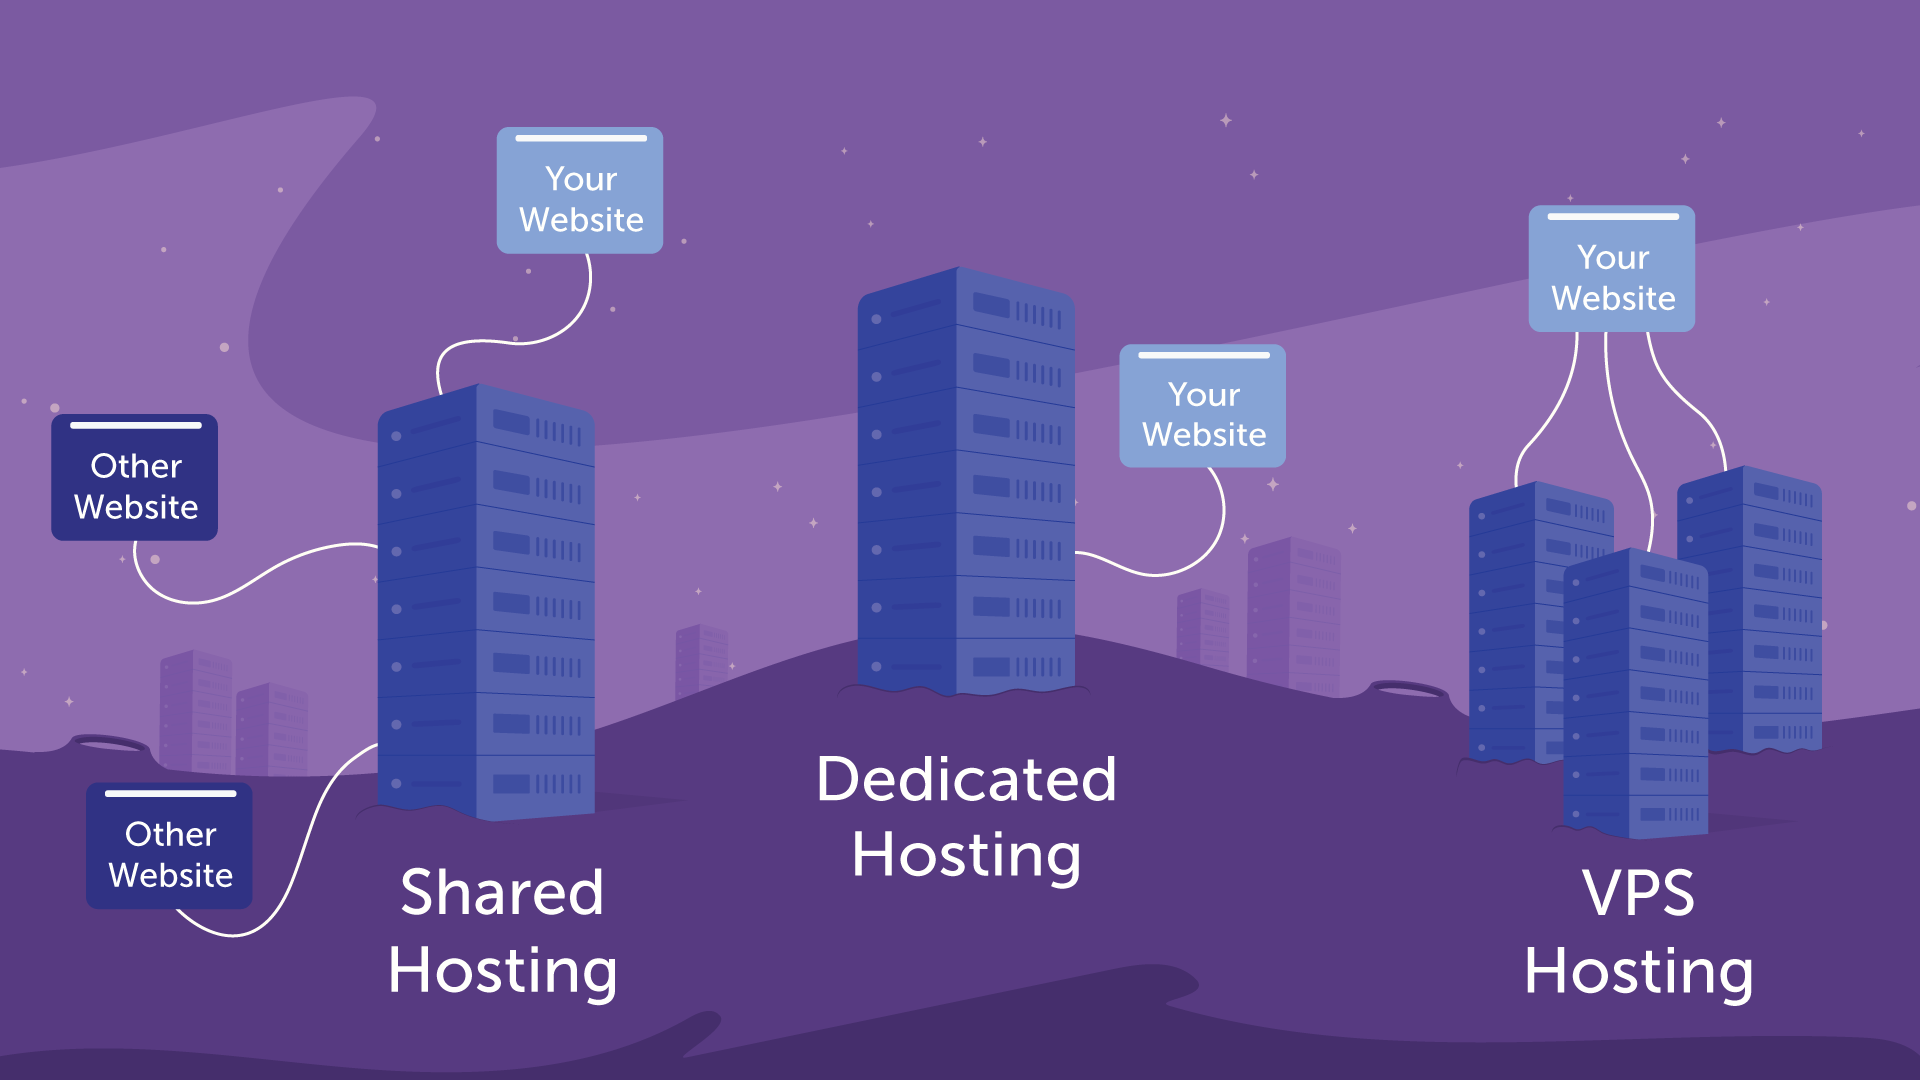
Difference between various hosting types
Every website runs on a server, and web hosting gives you the server space and resources needed to make your site accessible online. Learn how web hosting works and why it's essential for building and maintaining a website.